Archive for February 7th, 2011

Dealing with a Flat Tire

Flat Tire
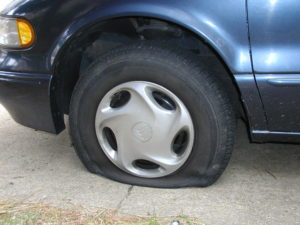
Dealing with a flat tire can be a troublesome event if you are not prepared. When your car’s tire goes flat, this kind of situation should not be a problem for you as long as you are properly prepared. After all, most cars already come with spare tires and a jack, along with other odds and ends that would help you facilitate changing your tires in no time at all. If you are uncomfortable with changing a tire or calling a friend, calling CAA in Canada or AAA in the US as long as you are a member will lessen the task for you.

Dealing with a Flat Tire Yourself

For some it might even be appropriate to try changing their tire when it is still inflated and under perfect conditions as a test run, so that you know how to change the tires. A neighbor had to call his oldest son to come and help him one night at 2 in the morning, because he could not figure out how to change the tire on his car.

There are proper ways to change a tire. Always make sure that you are doing so with safety in mind. To change a tire or a couple of tires, park your car first in an area where the ground is level. This helps to lessen the chance of the car rolling forward or backwards off the jack. Always place  parking brake on before you do any work at all. If your car is equipped with a manual transmission system, place it in gear. Always turn off your engine for there is no need for it to be turned on and running.

However, if you have no choice and have to park in an area where there is an incline, put a huge rock or a wheel chock beneath the opposing wheel. So that you would not find your car rolling down the incline.

In fact whether you are on an incline or not, it is always a good idea to block the wheels. You will stop the vehicle from moving for any reason. Also make sure you are well away from traffic so you can change the tire safely.

Changing Your Flat Tire

Remove  your spare tire as well as a tire iron and the jack from the trunk. Remove the hub cap if there is one. Then, loosen the lug nuts on your wheel while the wheel is still touching the ground. Do this before you jack up your car. Make sure that you loosen each and every lug nut that connects your tire to the wheel without unscrewing them completely. As long as the lug nuts are loosened up and not unscrewed completely, there is no chance that the wheel can come off by accident.

Following the instructions in your cars manual, place the jack in the proper location and  start jacking up your vehicle. Although we are repeating this point again, it is one of the most important things you should do. Check your car owner’s manual for the specifics on the location as per where you should put your jack.

When you jack your car, make sure that you raise your car a little higher than needed so that you can not only remove the old flat tire but you can also install the new inflated tire.

Once the car has been jacked up,  unscrew completely all of the lug nuts. Remove the flat tire and place it to the side. Roll your new tire into position and mount it on the lug bolts. Then, place back the lug nuts and tighten them up as tightly as possible without turning the wheel.

Now lower the jack until the wheel is contact with the ground. But not bearing the full weight of the car. Tighten the lug nuts one more time and then lower the jack completely and remove it. If you have a hub cap, you can now put it back on.

Repair Your Tires Immediately

We suggest that you have your spare tire repaired as soon as possible. Since you never know when you might have another flat tire. Also check the inflation on the spare tire as soon as possible since most tires will lose a little bit of air over time.

We are glad to receive comments from our readers and suggestions about dealing with flat tires. For more safe driving ideas, click here.

Save


Turning the Heat off While on Vacation

Turning the Heat off While on VacationWinter time is a great time to take a vacation. Get away from the cold weather and snow to somewhere sunny and warm.  Most people are really excited about their vacation and forget to think about their homes while they are away. One person I know left for two months without considering what would happen if the furnace stopped working. The heat system stopped working and the pipes froze while he was away.  The bill for repairs cost him $95,000 to have the repairs completed for water damage from cracked frozen water pipes. Turning the Heat off While on Vacation was very expensive for my friend.

Never Turn Your Furnace Off

For the record you should never turn your furnace off While on Vacation. You may want to turn the thermostat down while you are away to save money and reduce your heating costs.

Most people will turn down the thermostat in their homes when they are away for an extended period.  With the cost of heating fuel these days it is becoming more important to do this to save money and reduce your heating and electrical bills. The question is what temperature should you set the thermostat to while you are away? The answer really depends on a number of things.

  • Do you have plants
  • How long are you going
  • Do you have pets that will be at home
  • How cold does it get outside
  • Are there water pipes along exterior walls that might freeze
  • What does your insurance company require

Turning the Heat off While on Vacation – Consider Your Pets

If you have pets, you probably want to maintain the temperature at a level they are used to. Otherwise, they will suffer needlessly during cold evenings and nights. Some plants may also not do well if the home is too cold.

If you are planning to leave for more than a few days on vacation or a business trip there are a number of items to think about before you go so that you will not have to deal with a catastrophe when you return. We all want to save money, but there are some things that we just cannot avoid, otherwise, the cost could be much greater than what we are saving. Here is a partial list of items to consider. For a more complete list click here.

We put together a brief checklist of items that you may want to consider before leaving your home empty while on vacation.

  • Call your insurance company to confirm what they require to maintain your insurance. Many will not approve your claim unless you are following their guidelines.
  • Turn the water off before you go. Even if the furnace  is off and your pipes do freeze there will be far less damage to your home.
  • Turn down the thermostat to a reasonable level. We turn ours down to 60F or 17C, while other people are even more aggressive turning the thermostat down even lower.
  • Unplug all TV’s , radios, etc so that your electricity bill is minimized while you are away
  • Set lights on timers so that passersby will think someone is at home
  • Arrange for someone to clear the snow off the driveway while you are away
  • Have someone to pick up the mail and look after pets if you have pets
  • Arrange for someone to check on the house on a regular basis following the guidelines of your insurance company

Smart Meters

More and more people are also installing smart thermostats which allow them to control the temperature of their home remotely. For some this is a great invention which allows them to monitor the temperature and remotely set it to correspond with colder or warmer outdoor temperatures.

You can also check out a more comprehensive website by clicking here to review a full list of do’s and don’ts. Our travel web site as well has a list of steps to consider if you are moving to another country or going on a longer vacation.

We appreciate comments and suggestions about this topic. You can save money by reducing the heat while you are gone on vacation, however it pays to be smart about it and avoid larger expenses by not going overboard!

Save


Apple iPhone 4

Stolen iPhones and SecurityThis weeks Cell Phone Review is the ” Apple iPhone 4″ offered by AT&T, Bell, Rogers and other wireless carriers throughout the United States and Canada. While this is an older iPhone, they are up to 7 now with 8 on the horizon, many people still use this iPhone.
With the iPhone 4, Apple again shows that it is a powerful player in the smartphone wars. It won’t be for everyone, the call quality and reception vary if you don’t use a case, and AT&T’s network remains a sticking point for US users, but the handset’s striking design, loaded feature set, and generally agreeable performance make it the best iPhone yet and a leader in the smart phone wars.

The issues with call reception and call dropping seem to have gone away. Users now know how to hold the device and they also know that they should invest in a case which not only helps with call reception / dropping, the case also protects the device as well. Overall a good investment. These are sought after devices and in the writer’s opinion is the best smart phone on the market. However that being said, it may not satisfy everyone’s need. If your prefer the tactile feel of regular keyboard, then the Apple iPhone 4 will not meet your needs. Once you get used to the on screen keyboard, I have found that you can actually type as fast if not faster than with other more tactile keyboards.

Apple iPhone 4

Price Range: is listed as $299.99, however if you sign a contract, you can get it for a lower price, so negotiate. If you want to buy it outright, it is probably going to cost you in the neighborhood of $700.00

Features:

  • Candy bar design with internal antenna
  • Polyphonic ringer,
  • Voice dialing,
  • Call timer
  • Conference calling
  • Voice recorder
  • Caller ID
  • Speakerphone
  • Video editor, multitasking, integrated digital compass
  • 32 G of memory
  • SMS, Skype, email, POP2 , IMAP4, GPRS, EDGE, HSDPA
  • Internet browser
  • App store, Itunes, video calling
  • Supports MS Excell, Word and PDF
  • Download iBooks, Audio files, Video files, Games, iTunes music
  • 5 megapixel camera, auto focus, Video recorder and GEO Tagging
  • GPS maps and compass
  • Alarm clock, calendar, reminder, calculator
  • LCD display, 900*640 pixels, scratch resistant glass with retina display
  • Digital player – Apple Lossless, WAV, MP3, AIFF , AAC
  • 1 x Headset jack – Mini-phone 3.5 mm, 1 x Dock connector – 30 pin dock connector, USB cable
  • Lithium Ion battery
  • Talk time – Up to 840 min (2G), Up to 420 min (3G)

The Good: The iPhone 4 offers enhanced performance, a lovely new display, and an improved design. It also adds a ton of sorely needed features, both by itself and through the iOS 4 update.

The Bad: Multitasking entails some trade-offs, and home screen folders are limited to 12 apps. AT&T reception continues to be spotty, and you’ll need a case for the best calling reception. Also, we’d prefer a 64GB model.

From Reviews:

Display: LCD display, 900*640 pixels, scratch resistant glass with retina display

Keyboard: Built in Qwerty keyboard on screen

Audio Playback: Digital player – Apple Lossless, WAV, MP3, AIFF , AAC

Video Playback: Digital player – Apple Lossless, WAV, MP3, AIFF , AAC

Capacity: 32 G memory

Connectors: 1 x Headset jack – Mini-phone 3.5 mm, 1 x Dock connector – 30 pin dock connector, USB cable

Accessories: 1 x Headset jack – Mini-phone 3.5 mm, 1 x Dock connector – 30 pin dock connector, USB cable and many 3rd party accessories

Sensors: GPS & Maps

Headphones: 1 x Headset jack – Mini-phone 3.5 mm,

Size & Weight: 2.31 inches wide, .37 inches thick and 4.5 inches high weighing in at 4.8 oz’s

Colors: Black

External Buttons & Controls: Most are on screen, however there are volume, power buttons on the sides

Cellular & Wireless: WCDMA (UMTS) / GSM in the following bands WCDMA (UMTS) / GSM 850/900/1800/1900

Power & Battery: Lithium Ion battery, Talk time – Up to 840 min (2G), Up to 420 min (3G)

Languages: Multi language support

For more information about Apple iPhones, click here.

Save

Save


Installing Prefinished Hardwood Floors

Installing Prefinished Hardwood FloorsInstalling a prefinished hardwood floors is probably one of the easiest things to do compared to previous years. Most flooring companies offer professional installers to install their product. They also provide training to their customers if they plan to do the installation of the hardwood floor themselves. It might take you a bit longer. You will need some additional tools which you can rent or buy. However, you will have the pleasure of doing it yourself and the pride that goes along with it. In addition, you will also save some money as well. Originally installing a hardwood floor had multiple steps:

  • First, install the hardwood
  • Then sand and finish the hardwood to create the shiny look and feel
  • Add varnish or verathane to protect the wood and give it a finished look.

This was a great deal of work and there was dust from sanding everywhere in the home. Today, in fact, prefinished hardwood floors are by far the majority of flooring that is installed. There is still dust created from cutting the pieces to fit and from nailing onto the existing floor. However, the dust is much reduced compared to sanding a hardwood floor. Most installers who are refinishing hardwood floors will now use dustless sanders.

hardwood floor installationInstalling Prefinished Hardwood Floors

Whether you install the prefinished hardwood floor yourself or have a professional install it, you can start in the morning and have your furniture in place in the evening. That’s how quickly and efficiently the flooring is for consumers who want to install hardwood flooring. Add corner round to the walls to finished it off and paint the corner round to match your walls or furniture and you have a new floor that will last for many years.

If you are doing the installation yourself, chances are that you will be slower than a professional, so it may take a few days to finish the job. You will also have to purchase or rent a few tools including a hardwood floor nailer which makes the job much easier.

Customize Your Color and Wood

Another major advantage of prefinished hardwood floors is that there are multiple colors and stains that can be purchased. Choose something that matches your decor that will last the test of time with regard to interior design fashion and furniture selection. In addition, consumers can be confident of a consistent color or stain across their entire prefinished hardwood floor, however, be sure to select your wood from the same dye lot when you make your purchase and also purchase sufficient wood for the entire job. Different dye lots can have slightly different colors and stains.

The hardwood also comes in a variety of sizes as well as types of wood. Chose narrow planks or wider planks depending on the design you are trying to create.

Dealing with Dust

Although prefinished hardwood floor material can be purchased and installed ready to use quickly, there is one area that many people may not realize that they need to be prepared for.

Installing prefinished hardwood flooring in a new house is not a problem. All dust, shavings, etc will be cleaned up before you move in. Unfortunately, if you are installing flooring into an existing home, all of the dust from the time your home was constructed and also while you have been living in your home will be stirred up and find its way into everything. Even if you remove the carpet, sweep, vacuum several times there still seems to be a lot of dust that gets disturbed and lands on everything. Be prepared for a major dusting after you are finished.

Consumers should remove as much as possible beforehand. No matter how much you vacuum, there still will be dust clouds as the floor is being laid. Still, in the end, you will love your prefinished hardwood floor. When it is finished and the house is back to normal most consumers feel it was worth it!

We have had hardwood flooring in our home now for 10 years. It still looks as good as new and we could never go back to carpet! For more information on the Hardwood floor installation, click here.

Save


  • Copyright © 1996-2010 Managing Home Maintenance Costs. All rights reserved.
    iDream theme by Templates Next | Powered by WordPress