Archive for July 21st, 2011

Solar Powered Outdoor Security Lights

There are many new solutions that are coming onto the market that provide solar powered outdoor security lights for consumers to provide lighting in situations were it is just too expensive to provide regular wiring and pay for the electricity to run the lights. This can be a very economical solution compared to hiring an electrician and paying for installation of regular lighting.

Other consumers are only interested in providing a decorative solution to line garden walks, to provide a dim light to help people avoid going off a Solar Powered Outdoor Security Lights
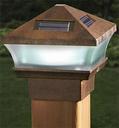
sidewalk or just for pure decoration.  Some sit on top of posts like the one shown on the left, while others are stand alone and come in a multitude of shapes.

They have spikes that allow consumers to place them into the ground just about anywhere as shown below on the left. Both of these pole mounted and stand alone along the grass are charged during the day and provide light during the dark evening using this same power as the batteries discharge.

Garden Spikes

These lights pretty much all work the same way. They consist of a solar panel that generate electricity. There is a rechargeable battery to store the electricity that has been generated by the solar panel and there is the light. Solar Powered Outdoor Security Lights
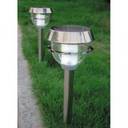
The light is usually manufactured using LED’s to generate a bright enough light. They can work for any given situation and draw little power. A small rechargeable battery can power one of these lights for the entire night.

This type is usually decorative and are provide a nice effect when they line a garden path or outline a fence along the edge of your property. They save money in the sense that it would be quite expensive to duplicate the same thing with standard lighting powered by an electricity system.

Solar Powered Outdoor Security Lights

There are other types of  lighting systems that provide more security for homes and businesses.  These are larger systems that generate more electricity, have larger storage batteries and brighter lights. Some come with motion sensors and some that just stay on all night.

These security lights are ideal for situations that have lots of sunlight. Especially if they are difficult to get to in terms of electrical wiring. They can be installed almost anywhere that you have access to sunlight for a period of time long enough to charge up the battery. The only cost you have is the initial system cost. There are no ongoing electrical power costs.

These systems also use LED lights which give off a bright light without generating a lot of heat. This makes them very efficient and allows the battery to last a long time.

Many systems are configured this way to enhance the use of solar panels. LED’s are a practical means of delivering light in locations that otherwise would be dark. Not having to introduce permanent wiring saves a great deal of money. It also eliminates electrical usage.

Solar Powered Outdoor Security – Use them at the Cottage

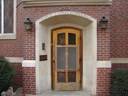
These are perfect for cottage use. The side door of a home and even in the backyard where it would be difficult to introduce electrical wiring.  One couple we are aware of only uses solar powered lights for their cottage and they have several similar lights around the outside of their cottage.

Most of these devices can also have the light located were you obviously need
the light and the solar panel can be mounted on a roof or post or even the side of a house a few feet away were there is more access to sunlight during the day. There are many solutions such as these for consumers to consider in using solar power to generate light and minimize the impact on the electrical system.

Camping Sites, RV’s , Tents and Cabins

We have talked about using these kinds of lights for home use. Either in the backyard or around the side of the home. They can provide a security type light or to illuminate the back yard.

Campers, RV owners and Cabin owners have long found that solar powered lights are a great way to make their excursions more comfortable. Although these smaller systems are only suitable for one lamp. They help to provide light in mobile situations and locations without any electrical power.

Larger systems are available to power lights in an RV for example. Also to Solar Powered Outdoor Security Lightscharge up batteries during the day for use at night. They also can reduce the load on electrical generators.  Before purchasing solar panels for this kind of application design a system based on need and application.
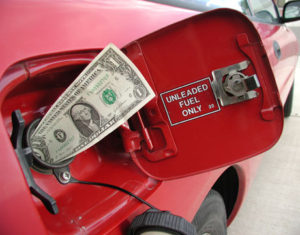
Do Your Math

In other words how much electrical load do you have in terms of lights, TV, fridge etc. How many batteries do you need. Also how many solar panels of a given size do you need to hook up to ensure the batteries are fully charged in a single day.

We will talk more about these in a future post. However we wanted to introduce this subject in this post as part of our solar panel security light discussion. Regardless of the application, consumers should go through this process of estimating the power needed. Then design a system to deliver this power.

This is the only way to obtain an idea of cost and equipment needed to meet your needs. Otherwise you may end up frustrated due to the cost or the lack of sufficient power.

More to come in this are , comments are welcome.


Home Burglar Deterrents

Home Burglar Deterrents – What do burglars look for when they are casing a home for illegal entry?

Home Burglar Deterrents  – If you have solid doors and windows that have been upgraded to make it difficult to break into by a burglar, chances are they will just move on and look for another home that is easier to break into! Burglars are looking for the easy score and will avoid difficult to enter places. Unless they specifically are aware of valuables that you may have they will just move on.

Check and Secure Your Doors

Selling Your HomeSomeone who wants to get into your home is going to come through the doors or the windows. It is going to be quick and efficient unless your door is solid and is dead bolted to a secure door frame. Our neighbors had their home broken into. All it took was a solid kick by the burglar to the door right at the lock location. The kick broken the  door jam and they were in with in 10 seconds. The door was then closed and no one knew the difference from outside. the moral of the story is

  • Install a solid steel door
  • Make sure your door has a solid lock on it
  • Make sure that the door jam is also made of solid material that cannot be easily broken
  • Install several locks on the door
  • Remember they may come in the front door, but they can easily come in side doors or the sliding glass door at the back of the home.

If you want to strengthen these doors you can also  install 2-1/2 to 3 inch stainless steel or nickel plated screws in all your exterior door jams. Be sure screws go at least 1-3/4 inch deep into the underlying framing lumber.

While you are  at it, consider getting heavy duty strike plates or a door reinforcement kit sold in many larger home improvement centers.

Home Burglar Deterrents


Sliding Glass Doors

Sliding glass doors are  a favorite target. All you need to do is lift the door  up and out and your burglar is inside your secure your sliding glass doorhome. No noise and no fuss. You can prevent this by

  • By installing several screws into the door’s upper track to allow just enough of the screw’s head protruding to allow free movement without allowing the door to be removed.
  • Several devices can be installed into the door’s upper or lower track that acts much like a dead bold by running a heavy pin through the door track and deep into the frame.
  • A length of old broom handle at a 45 degree angle in the door track also prevents the door from easily being forced open and works nearly as well!

Burglars Also Like Garage Doors

Electronic door openers make it very difficult for burglars to break in through your garage door. They cost around $150 and make it practically impossible to force open the overhead door from the outside without breaking through the actual door panels. Yes, it is possible for burglar to punch in the right code and gain access, unless you did not change the pre-installed settings.  Today’s remote controls have so many possible combinations, the odds are very slight, and the burglar won’t waste the time trying all the possibilities.

The key as we have mentioned is to  change the security code from the pre-installed settings which are almost always set to zeros.

Keep Windows Secure

Burglars will break windows as a last resort – or by accident. The preferred method is cutting an access hole or slipping in a thin stiff wire and undoing the locking device.

Most double hung windows have cheap locks which should be replaced. Use heavy duty sash locks or even keyed locks, if you can put up with the inconvenience. An old trick is installing a small eye bolt in either corner. If done correctly the window can’t be opened, with the eye bolt in place from the outside. Of course you could screw the window shut by drilling a hole through the frame. But it defeats the purpose of having a window, and presents a fire hazard. Not recommended.

Many people install roll-a-way electric security shutters, or decorative security grates. The main negative is they can prove to be a serious fire hazard and prevent your escape, especially if you lose power. Newer models install on tracks or can easily be pushed open from inside. This decreases their danger in the event of fire and the thick smoke sure to accompany it.

Inventory Your Home

The above steps can go a long way to protecting your home. But no matter how secure your residence is, if a professional burglar has targeted your home the unthinkable may still happen. To aid law enforcement agencies and greatly assist in insurance claims you should maintain a detailed household inventory of all your valuables.

It is impossible for you to recall all of the items you have in your home. The big things are easy, but do you know the model number of your electronic items. How about the year you bought them and the value of them. Probably not and this is were having a detailed  inventory can be a big help

Mark important items with some permanent identifying mark using a variety of simple tools. You can rent some of these that will engrave serial numbers. Engrave driver’s license number or some other unique marking into your valuables.

  • Detailed inventory
  • Mark items with an identifying mark
  • Video or picture inventory is helpful
  • Close up videos of important or valuable items
  • Tie them in with a family member in the picture
  • Update the tape or pictures each time you add items to your home
  • Keep the pictures or tape somewhere off site so they are available in case there is fire. Or your home is destroyed by a tornado or hurricane

Travelling with Smart Phones

Travelling with Smart PhonesAnyone who has traveled and used their smart phone will already know about this huge issue. I you have already received a bill for the time you used while out of the country then you know it is expensive. If you have not received your most recent bill yet, that covers the time you were out of the country when you used your phone you could be in for a big surprise. Travelling with Smart Phones can keep you connected, but watch your phone charges.

Roaming charges for both voice, text and data are incredibly high for anyone without a roaming plan outside their home country. The charges can be as much as $3.00 a minute or more in some cases just for voice calls. This can add up very quickly even if you are on a 10 minute call and will spend $30 for that call.

Travelling with Smart Phones

Many customers will turn off their data plans while they are traveling just to protect themselves from data charges. Even if you are not checking for email, your smart phone can be checking for up dates, syncing and receiving alerts to the various apps that you have on your phone. All of this data adds up and can amount to a significant charge if you are not careful.

Text messaging is the same. Most smart phones do not let you block the text messaging service. You have to call the carrier to stop the service from sending text messages to your phone. If you open them you will definitely be charged at international rates which can again be very expensive. Check with your carrier to find out just how expensive they are. Some will levy charges just for sending them to you even if you do not open the message.

Buy a Local Phone

Many customers will purchase a local prepaid phone in the country they are traveling in. Although the per minute charges are higher than what they might currently be paying for their service in their home country , the rates for prepaid service are often much lower than roaming rates.

You can do all of the same things you do on your regular phone depending on the phone and the prepaid package you subscribe to. Text , voice, and data are possible, although if you are traveling for a short time, voice and text messaging are probably ok.

WiFi Locations

Free WiFi sites are becoming more and more predominant and these sites are great to sync up and check emails, markets , apps such as Facebook, twitter etc. You can use your existing smart phone in most cases if it allows wi-fi connections. Again do not forget to shut off the data when you leave the wi-fi site to avoid a nasty surprise.
Changing countries

Each time you change countries, you need to pay attention to these issues. Traveling in North America, you only have to worry about Canada, the US and Mexico.  However in Europe you can travel across several countries in several hours, so keeping track of mobile phone plans can be difficult. Again buy a phone that is prepaid and covers the countries you are traveling in. Only buy enough minutes for what you think you will need. You can always top them up if you need more.

We would love to hear about your experiences traveling with your mobile phones and smart phones. Any tips and tricks that you can pass along will be much appreciated. For more details about smart phone security, click here.

Save


Getting Better Gas Mileage

Getting Better Gas MileageThere many ways to  save  money while operating  your car. It is becoming more and more important to make sure that your car is in perfect working condition. If you are going to limit your costs at the gas pump make sure it is well maintained. Many of these things can be completed by the driver with no need to take your car into the dealer or to a local garage. And, these things do not cost a lot of money either. You can easily save money and get better gas mileage by following a few simple steps. We will try to capture a few of them in this post.

Getting Better Gas Mileage

Keep Your Tires at Full Pressure

One area of maintenance that will help to maintain gas mileage with your car is to keep the tires at the optimum air pressure as specified by the manufacturer. Tires at low pressure will not only deliver poor mileage, the tread will also wear off more quickly. The tires can also over heat at high pressure  potentially causing an accident if they were to explode at high speed. If your tires are filled with nitrogen, which more and more cars are you will need to go to a some place that can handle nitrogen filled tires. The good thing is that tires filled with nitrogen require less topping up!

Change your Car Fuel Filter

A blockage in the car fuel filter can rob the engine of power, causing it to run lean and actually hurt the engine over a period of time. The fuel filter is designed to remove deposits in the gasoline and prevent them from entering the engine. Over time it will become clogged so change it as per the manufacturers instructions.

Good Quality Tires

Tires  that are well balanced without excessive wear can give you better fuel consumption as well. Ensure that they are always balanced and as mentioned earlier are at full pressure.

Clean Air Filter

Replace the air filter in your car on a regular basis. As a minimum check it each time an oil change is performed on the car. Replacing a clogged air filter can improve the mileage that you get with your car by up to 10 percent.

When you calculate that 10 percent into gasoline savings, you’ll be saving up to 45 cents per gallon at current prices in North America. You can ask your mechanic to check the filter and recommend if it needs to be replaced. The mechanic can then replace the air filter in your car or you can do it yourself.

Wheel Base Alignment

Improper alignment will cause bad tire wear on one side or another and a certain amount of engine drag,. This will also increase the amount of gas that you are using.  If you notice that the tires are wearing on one side or another, talk to your mechanic about your next alignment servicing.

Another way that you can tell if your car is due for alignment is if the car pulls to one side of the road or another. You may also feel this  pulling on the steering wheel when you are driving.

Rotate Your Tires

Regularly rotate your tires and check them for uneven use and wear. Rotating your tires ensures even wear across all of your tires. This step will extend the overall time that you can use the tires on your car as well as  you will find that you are saving in  gas costs.

After you have an alignment done on your car most mechanics will also rotate the tires. This doesn’t by any means mean that you should wait until you need an alignment to get those tires rotated.

Balding Tires

Not only are they not safe to drive on especially at high speeds They are far more dangerous in snow and rain conditions, since they will not grip the road at all. You may lose control causing an accident.

Comments are welcome. Look after your car and keep it well maintained to ensure that your driving is safe and you get maximum gas mileage. For more information about getting better gas mileage, click here.

Save


Hardwood Floor Sanders

Refinish Hardwood FloorsAn important part of resurfacing or refinishing an existing  hardwood floor is sanding. A professional sanded floor can add immense value to an old floor. Hardwood Floor Sanders can remove gouges and scratches, bring out the true beauty of your floors, and also allows you to change the stain if you wish to enhance the floor. This is work that can be completed by the average person.

Provided that you take the time to learn the proper way to sand a floor and also use the right equipment. If you make a mistake and ruin your floor it can be very expensive and depending how bad the mistake is, you might even have to replace the flooring with new flooring. Take your time, learn what you need to know and talk to experts. Experiment on a small area first to make sure that you have the proper procedure nailed down. Select an area that is out of the way and perhaps hidden by furniture.

 Sanding is needed

Sanding is necessary to remove water marks and other damage that may have occurred on the floor. When you have  large surfaces to cover, a hardwood floor sander is the only way to refinish a hard wood  floor. We have gathered some information regarding hardwood floor sanders along with some tips on their operation for those interested in taking on the task. Sanding the floors yourself can also save the consumer a lot of money, however care is need to make sure it is done correctly or you could actually ruin the floor completely.

Hardwood floor sanders come in many shapes and forms and each will perform their task in a different way. There are drum sanders, belt sanders, orbital sanders and disc sanders. Along with this there are still edge sanders to deal with not to mention the sand paper itself.

These machines are helpful tools when used properly, however if placed in the hands on someone lacking experience they can cause a lot of damage with expensive repairs required.

Hardwood Floor Sanders

Drum Sander

The most common of all the hardwood floor sanders is the drum sander. These sanders are meant to get right down to the bare wood and they do a good job. One problem with the power of drum sanders is that if you are not careful you can sand a groove in your floor. This means you should have some previous experience with the machine. Experiment first before you try it out on your expensive hardwood floor. It is a good idea to take a scrap piece of wood and try it before moving to the real floor.

Remember to use these sanders in the direction of the wood grain. This is also very important. Sanding across the wood grain will leave scratches that the stain and verathane will enhance leaving you with a non professional looking floor.

Belt Sanders

Belt Sanders are the next most seen of the hardwood floor sanders and are somewhat easier to use. These sanders do however require control and strength in order to do the job well.

Other Hardwood Floor Sanders

Orbital Sanders and disc sanders are more suitable for small jobs or for sanding specific areas. These however are known for their tendency to leave circular marks in the floor.

With hardwood floor sanders, everything comes down to what you feel comfortable with and what you are capable of handling. Gaining experience before you use the sanders on your floors is highly recommended. A good sanding job will revive your floors and add value to your home. Some of the larger chain stores will offer training courses from time to time on the use of equipment. These are definitely worth the time and you can then approach the job with more confidence.


Cleaning and Caulking Shower Tiles

Cleaning and Caulking Shower TilesCleaning and caulking shower tiles is potentially a big money saver if you follow a regular maintenance schedule. Showers are exposed to regular moisture contact and as long as the grout between the tiles is complete, no water will penetrate through to the drywall behind. The moment that even a small pin hole is created, moisture starts to penetrate through the pin hole, causing the drywall to swell and once it penetrates the drywall behind the tile, this also expands as well. We have added a couple of pictures to show the kind of damage that can result from just a little bit if water getting behind the tiles and causing the drywall behind the tiles to expand.

Cleaning and Caulking Shower Tiles

Expansion of either the grout or the drywall will cause the tiles to begin to shift and be pushed outward, which may cause them to crack or to even fall off the wall in particularly bad situations. Once this happens you are into a major repair which can cost thousands of dollars. This is why it is so important to check your tiles and the grout between them at a minimum of once every 3 months. Look for small areas were the grout is loose or has fallen out and replug with new water proof grout. Patching like this will prevent water from penetrating behind the tiles causing damage to your shower walls. Consumers can patch these small holes with a show patching compound sold at most hardware stores. It only costs a few dollars and yet it can save you thousands of dollars in repair costs.

Checking Your Tile Grout in Your Shower

This is an easy job and only takes a few minutes to check your shower. I use a toothbrush to rub any suspect areas and also clean the grout if needed. Most times there is nothing to do, since the grout is solid and there are no observable gaps. But every once and a while, I have found areas were the grout has actually fallen out from between the tiles. They can be as short as a quarter inch long, while others are as long as an inch. Either way you must plug these immediately to avoid long term expensive damage.

Repairing the Missing Grout

I use a tube of silicon grout that I squeeze into the hole were the grout is missing. It is the same color as the existing grout, however because it is silicon, it does have a different texture from the existing grout. I am ok with this, since I am mainly worried about the leaks more than the look. Besides there is not that much difference in the grout that is there from the silicon grout that I put in. You can pick up a tube of this silicon grout from most hardware stores as well as plumbing stores. A $5 tube is infinitely better than many thousands it will cost to repair a shower. Of course once you start the shower, it usually means that you redo the entire bathroom, tub, sinks, toilet, mirrors, flooring and paint.

Delaying this huge cost as long as possible is a no brainer as far as I am concerned! Follow the instructions on the tube, making sure that you dislodge any grout that is loose between the tiles first. Let it dry for 24 hours and you can use your shower again.

What are the Costs to Fix the Show Tiles

Let’s assume that you don’t bother to perform this routine check and repair every 3 months. Your tiles are dislodged and about to fall off. It looks really bad and there is also black mold forming on the grout and even in the tiles. Your spouse decides that not only do they want the shower fixed, they are going to update the entire bathroom! What will this cost.

Of course the cost will be design dependent and also dependent on whether you do the work or you hire professionals to do the work for you. My neighbor is the type that does not do the 3 month check ever! He also does not do anything himself, so he is forced to hire people all of the time. He has estimates for updating his bathroom that are in the range of $25,000 to $30,000! Can you imagine spending this much money on a bathroom?

Get off your chair and check the bathroom shower tile right now and make the repairs immediately. You will save many thousands of dollars by doing this simple activity!

Comments are welcome about this subject and others.


Save


  • Copyright © 1996-2010 Managing Home Maintenance Costs. All rights reserved.
    iDream theme by Templates Next | Powered by WordPress