Archive for December, 2014

UN Report – Cut Emissions to Zero!

Cut Emissions to ZeroThe UN Report – Cut Emissions to Zero was just issued. It suggests that we must reduce our emission of pollutants to zero within a few years. If we do not, we will have lost the opportunity to deal with climate change. It will be here to stay. What does this mean for the average person? Right now nothing really since few politicians will change or take on this issue. The average person will probably not even be aware of the impact until it is too late.

Companies on the other hand will discourage any immediate action since this will immediately impact the bottom line i.e. profits. Share holders will be impacted. Can we eliminate pollution like the one in this picture quickly? This one and a thousand other locations around the planet must be reduced if we are going to make a difference. We need to reduce our use of vehicles to make these companies change.

What Does the UN Report – Cut Emissions to Zero Mean

Well what this writer got out of it was that the average temperature is going to up by two degrees around the earth. This means that some areas will experience much wider swings. Probably this means more violent storms, more desert areas, more flooding and hotter summers. Ice caps will melt and the seas will rise. Tropical diseases will head north and south. Life as we currently know it will be much different, especially for those people living in low lying areas. Flooding from the sea and high tides will do a lot of damage.

Can We do Our Part?

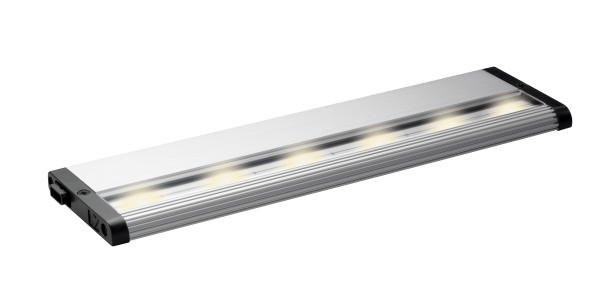
The answer is yes but it is going to cost you some money. Reducing the energy that is being used by every family is the first step which is really what this web site is all about. Turning down the temperature for heating in the winter, turning up the temperature for air conditioning in the summer, using CFL lights or LED lights and driving more efficient vehicles are among the major things that we as consumers can consider. Can we go further than this, well of course we can, but this is where it really takes some time and some money to reduce your overall energy footprint.

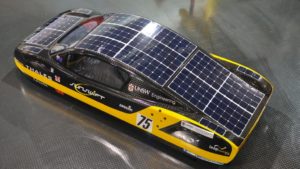
Considering solar power for your home, wind power for your home are two options. Better insulation for your home, reducing the packing of products that you purchase, recycle everything, walk to work or use public transit or bike to work would be better. Think about everything you do in your life and consider how you can reduce the energy foot print to make your own contribution. Let’s hope that the politicians get it right and initiate the steps to take us towards zero emissions!

For more topics and ideas about energy reduction, click here.


LED under cabinet lights

LED under cabinet lightsLight your kitchen counters for pennies a month by using a new solution, ie. LED under cabinet lights that are easy to install and save you money at the same time. In our specific situation, we were doing some do it yourself work in the kitchen replacing existing fluorescent bulbs, the tube variety, when we noticed that the plastic holder for the lights had become brittle, cracked and fell apart in our hands. In fact I even got a bit of an electrical shock when I accidentally touched the now bare connectors. It was time to change the entire installation with something new and we opted for an LED under cabinet lights solution.

Are LED under cabinet lights ready for prime time?

There are some barriers to using LED lights. First the cost is still high, but if you live in the right area, there are some financial incentives in terms of coupons available to use towards the purchase of LED lights. Check for available coupons before you make your purchase. Secondly these LED’s use so little power, they pay for themselves relatively rapidly, especially if these lights are left on a longish time in your home which ours are. They also come in various colors so you may want to check this out before buying.

LED under cabinet lights brighten  our kitchen!

We put two LED under cabinet lights beneath each cabinet, for four in total. We could have used 20 watt Xenon under cabinet lights. That would mean whenever we have the under cabinet lights on we’d be using 80 watts. This is a not insignificant amount of power. Since we love to cook, and spend hours in our kitchen each day, that could add up to a reasonable amount of electricity consumption by these Xenon bulbs – about 120 kWh a year, or around $20 in electricity costs, based on our leaving them on for 4 hours a day. Our LED under cabinet lights, in contrast, use a mere 2 watts each – one tenth the power consumption of Xenon lights or other halogen puck lights – and cost us under $2 a year to run.

The LED lights we purchased are daisy chained together and the final one is plugged into a regular electrical outlet. Our existing fluorescent lights were hard wired which is not to code today. We had to install a properly grounded electrical outlet and plug the new LED lights into it. Fortunately the plug and the actual LED bar are hidden by the cabinets that provide for this sort of thing.

We are very happy with the quality of the light and leave these lights on almost all day long. They do not generate any heat what so ever so there is no worry about over heating either.

Upgrading to LED’s

We have decided that when our current crop of fluorescent bulbs finally stop working(they do last a long time), we will switch to LED lights. In addition we also installed a new LED chandelier over the kitchen table. The only caution here is that if you want to dim these lights, you must purchase a special dimmer switch that is suitable for use with LED lights.

All told, I spent about $90  for four 4-light kits. Certainly more than Xenon would cost. However these lights don’t get nearly as hot as Xenon under cabinet lights.  There will be less heat damage to my cabinetry. There is also less heat produced indoors during hot weather (which can affect air conditioning costs).


Sunswift Eve Solar Powered Car

Students hope to break 20 year record of 45 mph over a 310 mile course. This particular car is covered with solar cells as shown in the picture. While not esthetically pleasing, the objective is to show that this technology will work and will provide power over longer distances and also higher speeds. if perfected, the esthetic issues can be dealt with later to get it ready for mass production and for the public in general. The real challenge will be to not add weight to the car while improving the esthetics.

It also begs the question regarding why more vehicles do not use solar technology. For example why does the Toyota Prius not include solar panels to augment the electrical power generation in the brakes and transmission etc.? Overall mileage could be drastically improved we believe if solar technology was included in cars like the Toyoto Prius. back to the Sunswift Eve Solar Powered Car, which is really the subject of this post.

Sunswift Eve Solar Powered Car

  • Capable of 87 mph
  • Uses as much power as a kitchen toaster and can travel 500 miles on solar power
  • Solar array generates 800 watts of power on a sunny day
  • Car body weighs 661 pounds made of carbon fiber

Results of Tests in July 2014

Exact facts and figures we cannot quote until the FIA has undergone ‘homologation’ or official verification of the record attempt. They will update the details in due time.

What we can reveal is this:

  • Our car traveled at over 100km/h for the distance.
  • The attempt only used $0.50 of electricity
  • Subject to verification from CAMS (Confederation of Australian Motor Sport) we may qualify for additional Australian land speed records for 100km and 500km electric cars.
  • We are the first FIA World Record set in Australia since 1984.
  • We are the first Australian record since 1994.
  • During a practice test run we achieved eVe’s top speed to date of 132km/h.

Is this the wave of the future? Who knows, but it is fun to keep track of these kinds of trials and tests to see what is being developed and what will make it to the factory floor for mass distribution.


Painting a Room – Steps to Follow

Painting a RoomHaving just spent the last couple of weeks painting several rooms in our home, I thought it would be interesting to write about what I learned. And cover some of the steps to follow when painting a room in your home. We have baseboards along the floor which is standard in all homes, hardwood floors and popcorn ceilings. There are several windows and doors with closets. This means there is lots of trim to deal with. In addition these rooms have not been painted in a while so there are nail holes in the walls that were used to hold up pictures, mirrors and small paintings. There is even the odd nail pop and other imperfections to deal with.

In addition, to painting my wife has decided that all of the door hardware etc is going to be changed along with the window coverings. You get the idea we hope of what the typical room is like and what needs to be done.

Painting a Room – Preparation

Proper preparation of a room before you actually start painting can save you a lot of time. For example all of the furniture should be removed from the room or at the very least moved into the center. Everything should be taken off the walls. Any nail holes or nail pops should be sanded and plastered. There will be dust on the floor and on the corner round. Make sure you vacuum up all of all of the dust and then wash the floorboards and corner round. The last thing you need to do is to apply tape on the floor against the wall to protect the floor from any paint while you’re painting and doing edging. Some people will also tape the windows to keep paint from getting on the window panes, however I just use a steady hand and a high quality brush.

Painting a room – painting

The next step is to actually paint the room. Start by cutting in all of the edges along windows and floors and ceiling. You can use a one and a half inch brush that has that is high-quality. When cutting in make sure you paint from the edge out at least 3 inches from the wall or window. Once all the cutting in is completed, you can then use a roller to paint the walls. Never start at the edge, always start at least one roller width from the edge of the wall or the last point that has been painted. Roll back towards the area that has been painted.

This allows you to overlap and distribute the paint evenly. Roll slowly so that you don’t have paint splatter. If using latex paint you can usually paint again the second coat within a few hours however I’d like to wait at least 24 hours before adding the next coat.

Give all of your trim a new paint job as well. We painted all of the window trim, door trim and doors with white paint  to provide a contrast against the paint that we placed on the wall.

Painting a room – replacing hardware

If you are replacing the hardware on the doors for example remove the old hardware first before painting. Complete all of your painting and then install new hardware. Hardware includes hinges as well as door knobs or handles. Following this approach will avoid paint getting on any of the new hardware.

Painting a room – clean up

Once you have completed painting the room it is now time to clean up. You will want to remove all of the painters tape that was placed on the wall and windows. You may also need to do some touch ups here and there if you found that you missed a few spots. If by chance you got any paint on the floor now is the time to clean the floor. Vacuum first and then wash all of the floors to complete the job.

While this sounds like a lot of work, it is the best way to ensure a high quality job.


  • Copyright © 1996-2010 Managing Home Maintenance Costs. All rights reserved.
    iDream theme by Templates Next | Powered by WordPress