Archive for April, 2015

Repair Loose Fence Post

Repair Loose Fence PostResidential fence posts become loose for a variety of reasons. In some cases, the post is not far enough into the ground and becomes loose endangering the entire fence. Always plant a fence post at least 30 inches into the ground. Or even 36 inches so that the base is well below the frost line in cold climates. Older fences in a high moisture environment such as lawn or shrub areas that get a lot of water will tend to rot just below the ground level. If you not monitoring the situation, the post will break at ground level. Your entire fence can fall over. Repair Loose Fence Posts before they become a problem.

Some posts are in sandy conditions. If the sand is eroded from around the post, there may not be enough support to the post to keep it solidly in the ground. Regardless of the situation, many homeowners wonder what can be done? Aside from replacing the entire fence at some significant cost, what can you do? There are several solutions ad some are quite inexpensive if you do it yourself.

Repair Loose Fence Posts

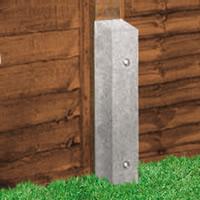
The best way by far is to replace the post and make sure that it is deep enough in the ground to properly hold the fence in all kinds of conditions especially in windy situations. A post can rot at ground line, while the rest of the post and fence is in perfect condition. If replacing the post is not an option, another is to drive a four inch square stake into the ground as shown in the picture and then bolt the old fence post to the new steak. Consumers would usually do this on the inside of the fence so that the exterior looks unchanged.

Dig down about a foot on the inside of the post. Make a hole that is slightly larger than the stake. Drive the steak down at least 30 inches so that is well planted and solid. Fill the hole to ground level around the steak so that is also properly supported at that level. Finish by bolting the steak to the old fence post.

Another product is a steel post that can be driven into the ground alongside the old post. A wooden post is then bolted to the steel stake and then also bolted to the old fence post. This works equally well and sometimes is much easier to drive into the soil, especially if you are dealing with hard clay conditions.

This approach to repair loose fence posts is much less expensive than replacing the entire fence and will give you many more years of use from your fence.


Solar System Installation DIY

Solar Panel DesignIn our last post, we discussed the need to get a solar system design and to get approval for permits from the city and the electrical organization in your area. It is extremely important to have all the permits in place and approved before you start installation.

Solar system installation is pretty straightforward. However, you do need to know what you’re doing and be able to follow an electrical design. There are also practical ways to install cables and mount hardware on your roof. You do not want to damage your roof in any way. It could cause water leakage or deterioration of the roof material.

Solar System Installation

It is often better to hire a qualified solar installation professional. They will ensure that everything is done according to the electrical code, the permit that has been approved, and the solar system design that has been laid out.

If there are any damages caused by the solar system installation, you may attempt a claim against your home insurance. Make sure that everything meets the electrical quote and installation procedures.

In fact, before you begin installation, you should confirm with your insurance company that they will insure your home and the electrical system. You may have to add a rider to your insurance for proper coverage.

We also suggest that you discuss the installation with the installer. Make sure that you’re totally 100% comfortable with everything that they’re going to do. Particularly with any mounting hardware, they’re going to install on the exterior of your home, as well as penetration through any walls for cabling and installation in the interior of your home.

Most installation companies will be more than happy to explain all of this before they begin.

For more thoughts and ideas about using solar power, click here.


Solar Panel Design & Permits

Solar Panel DesignDetailed Plans that are designed specifically for YOUR solar installation must be prepared for a number of reasons. Prepare an estimate of the cost for the material and the labor from the plans. They are also used to guide you or your contractor in the installation of your system. Your local electrical company must approve the plans first. Another reason these plans need to be prepared is that a permit must be submitted. It needs to be approved by the city before any work can begin.

Solar Panel Design & Permits

A complete package must be ready to submit to the city for permit approval. Some consumers go ahead with construction and installation without a permit. There is a very good chance that the city inspector could come by and shut everything down. You might have the installation complete only to have to remove it if you do not have an approved permit.

There is another even more important issue to consider. Insurance on your home covers all of the standard perils. However, insurance does not cover the installation and operation of an electricity generation system. In addition, if there is a claim, you definitely want to have all of the correct designs completed. A professionally designed installation meets all of the necessary building codes, etc. If not, the insurance company could easily decline to pay you.

Compliance with City Building Codes

Draft every Solar Electrical Design properly. Draft the plans to comply with city codes and NEC regulations for insurance purposes and safety purposes. Safety applies to your home, family, and the electrical grid you are attaching. The liability could be significant if you were to cause some kind of damage to the electrical grid. What about another homeowner’s electronics, etc, due to spurious currents? You could be liable for very large sums of money. Obtain the proper approvals. Complete the job correctly. It should meet all code requirements.

You may also need to make some changes to the plans based on these permit applications. Make sure that your solar design company is able and willing to complete these revisions. Resubmit the plans for approval.

For more information about solar panels, costs, installation, and more, click here.


Asphalt Shingles Losing Granules

Asphalt Shingles Losing GranulesThis roof is in serious need of replacement. Not only are the asphalt shingles losing granules it is also beginning to curl creating potential for leaks. Curling shingles are caused by a combination of age, hot temperatures and poor attic ventilation. If you want your shingles to last, make sure that you have lots of air ventilation. This allows the hot air that builds up in your attic to escape through roof vents. You can never have enough ventilation. If you are having your shingle roof replaced, arrange to have the old vents replaced with new high capacity vents. You may also want to add several vents as well if you have a large roof and a limited number of vents. Hot attics contribute to premature aging of the shingles and granular loss that greatly shortens the life span of the shingles.

Asphalt Shingles Losing Granules – Trees

Another situation that sometimes can contribute to premature aging is the effect of overhanging trees on your roof. The trees will prevent sunlight from drying the roof on damp days and they drop leaves and other material on the roof. All of this extra moisture can contributed to increased granual loss especially during extreme temperature fluctuations.

Try to keep your roof free of debris and also clean out any eaves troughs that you may have. Moisture can seep up under the shingles if the eaves troughs are plugged and full of water. Also avoid walking on the roof. Anytime you walk on a shingle roof, it will damage the shingles, causing more granual loss and in the case of the roof shown in the picture actually break off portions or at the minimum cause cracking of the shingles. Cracked shingle, loose shingles and broken shingles are perfect opportunities for water to seep in throght the roof causing more damage to the supporting structure underneath, the insulation and even into the living porting of the home.

Again, if your roof looks like the one in the picture above, have it replaced immediately before water causes even more damage inside your home.

Save


  • Copyright © 1996-2010 Managing Home Maintenance Costs. All rights reserved.
    iDream theme by Templates Next | Powered by WordPress