Maintenance

Regular House Maintenance

Regular House MaintenanceRegular house maintenance is something that all of us need to pay attention to if we want to protect our investment and make sure that our home goes up in value over the years along with our neighbor’s houses. One of our neighbors thinks that his house is worth $600,000 because he has a large home. He has a large lot which is on the surface very attractive. In fact, there are homes in our neighborhood that are worth amounts in that range.

He has not maintained his house that well. So it needs a lot of work. Someone who would like to buy his home would look at it and then look at all of the money he would have to spend. For example, it is a 2500 square foot home. All of the carpets and the linoleum ( who has linoleum in their kitchens now) would have to be replaced. Most people would put in hardwood and tile. The cost can vary a great deal. But let’s assume the cost would be $20,000. The entire home would also have to be painted which would cost another $10,000 approximately. He has a three-car wide, 2 car deep driveway that would need to be repaved, which could cost another $8000.

Regular House Maintenance

The windows should also be replaced and there are a lot of windows and these could cost up to $30,000. While they are at it they would probably want to update the bathrooms. Also, update the kitchen which can cost anywhere from $40,000 to as much as $70,000. The sky is the limit of course and it could be done on the cheap or nothing at all could be done. Excluding the cost of the kitchen and the bathrooms, the total comes to $70,000. Most people would want to do something to the kitchen and bathrooms. So let’s allow a total of $30,000 for that which takes it to $100,000 in maintenance expenses.

We have not even touched the outside in terms of things such as landscaping etc that need to be done. The point is what should be a $600,000 home might only be worth $500,000 or less. It depends on what the comparables are and how much competition there is from other homes on the market.

The point we wanted to make with all of this is that consumers need to complete regular house maintenance to maintain the value of their homes. This man has lived in his home for over 25 years. He could have completed some of this maintenance over time without it all adding up in the manner that it has.

Maintenance Activities

Here is a brief list of maintenance activities that will help to maintain the value of your home provided that repairs are completed when identified.

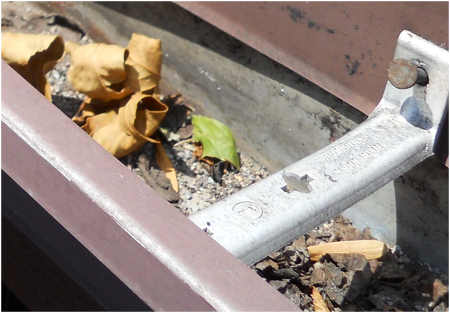
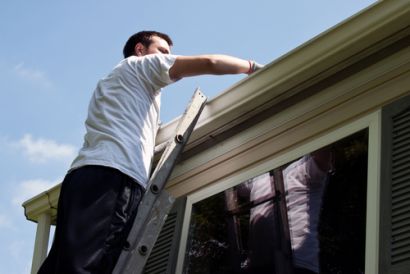
  • Check your eaves trough and make sure it’s clear of leaves during the spring and again in the fall
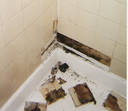
  • Check all of your windowsills to make sure they are not rotting and are well sealed, paint them every year or two
  • Repaint your window frames if necessary, especially if the paint is flaking off
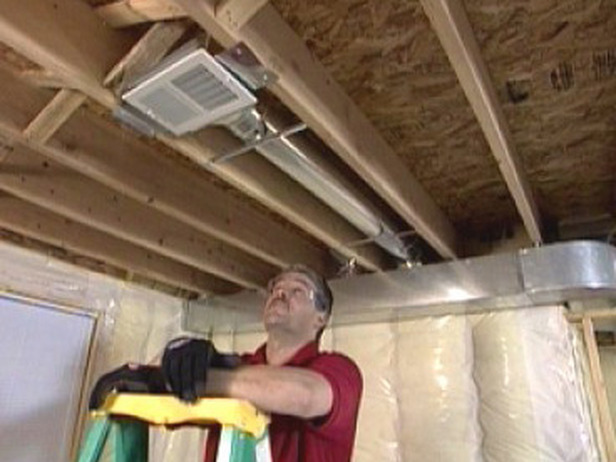
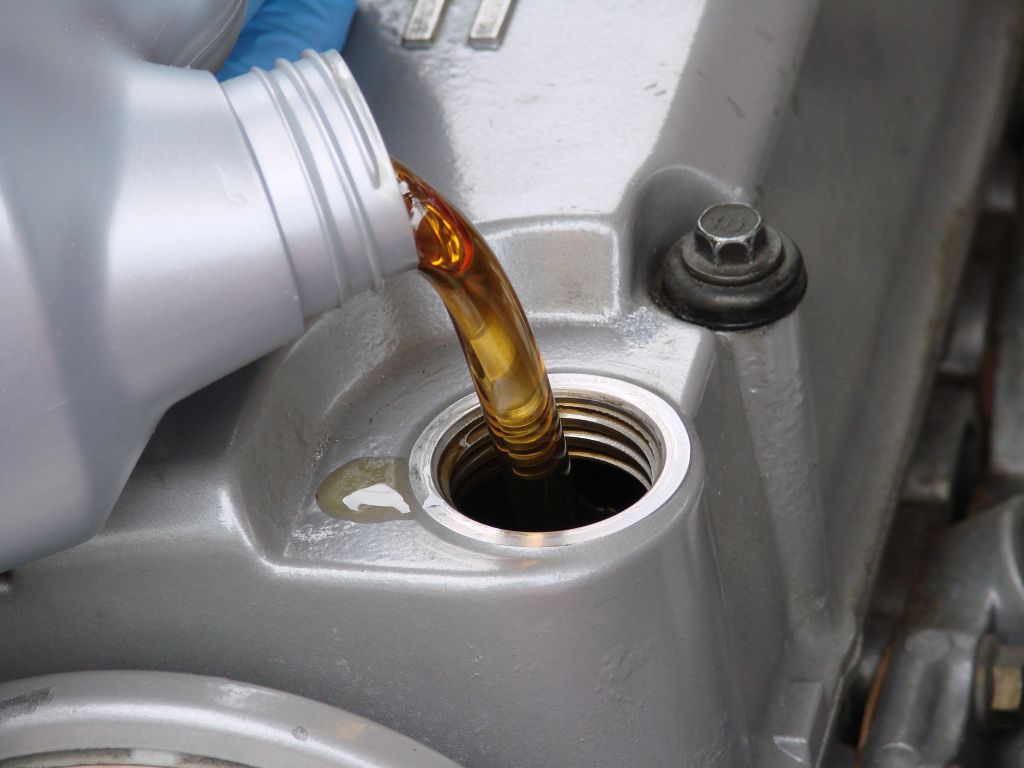
  • Replace your air filter on your furnace at least once every 3 months and more often if your home is dusty
  • Make sure there is no debris around your air-conditioner, otherwise, it will overwork and burn out
  • Trim all of your trees and shrubs, to keep them looking great and also not block windows
  • Add fertilizer spring summer and fall to your lawn
  • Remove all leaves and debris from the lawn and gardens in late fall and early spring to protect your lawn
  • Check all exterior walls and the roof for any damage from the wind, rain or snow

Save


Routine Home Maintenance

Routine Home MaintenanceBy doing routine home maintenance, consumers can save themselves thousands of dollars in major repairs. For example by making sure that the down pipe from the eaves trough is delivering water onto the lawn instead of around the foundation can avoid major leaks in your basement.

Routine Maintenance List

The following is a list of routine maintenance items that we consider important to help ensure that major repairs can be avoided, which will save you thousands of dollars. Of course each situation is different and should be evaluated in the context of your own home and weather environment. Here we go:

  • Routine maintenance should include the following kinds of things –
  • Check your eaves trough and make sure it’s clear of leaves
  • Check all of your windowsills to make sure they are not rotting and are well sealed
  • Repaint your window frames if necessary
  • Replace your air filter on your furnace
  • Make sure there is no debris around your air-conditioner
  • Trim all of your trees and shrubs
  • Add fertilizer spring summer and fall to your lawn
  • Remove all leaves and debris from the lawn and gardens in late fall and early spring
  • Check all exterior walls and the roof for any damage from the wind, rain or snow
  • Have your furnace checked on an annual basis
  • Change the oil in your lawn mower  and snow blower at least annually
  • Reseal wooden decks as needed whenever you see sealant chipping off or exposed wood
  • Seal your asphalt driveway at least every two years
  • Evaluate when you should replace the shingles on your roof

We could probably add more to this list, however we think we have captured the major issues that home owners need to deal with to ensure that they do not end up with a major expense. We will expand on one of them to give you more detail.

Clean all Leaves etc out of the Eaves Trough

This small maintenance step should be completed in the spring and the late fall. Basically you want to have all of the leaves removed from the eaves trough to ensure that the water flows easily and does not sit in the eaves trough. Heavy water sitting in the eaves trough will cause them to sage and even fall down over time. If you live in a cold winter environment, the water and leaves will freeze and block the flow of water when it does thaw. Water can back up under the shingles due to ice dams and cause leakage into your home causing all kinds of water damage. Keep the eaves trough open and clear will help to reduce this kind of issue from occurring.

Save


Routine House Maintenance

Routine House MaintenanceEvery home needs home maintenance from time to time regardless of where you live and the size of your home. Completing this home maintenance work can mean the difference between spending a few dollars vs. major repairs. Because you just did not address these issues fast enough.

This post was really originated by something that I observed that my neighbor is not doing. I have mentioned it to him several times. However he either forgets, ignores what I am suggesting or just does not care. I know that he does not like to do maintenance around the home. He will likely pay for it sometime in the future.

He spent several thousand dollars having his front yard landscaped. It looks great and he had the landscapers install shrubs and flowers in his gardens as well. The landscapers installed an underground drain from his down pipe from the eaves trough into the lawn. There is a reservoir under the lawn. There is also an overflow tap that pops up in a situation where there is a heavy rainfall.

Fall Maintenance

In the fall you remove the down pipe from this underground pipe. Redirect the water out over the garden towards the lawn. We get very cold weather. This prevents a lot of ice buildup around his foundation in the winter time and helps dissipate the water away from his foundation.

In the spring you are supposed to reattach the eaves trough to the underground pipe. The water will once again flow underground out onto the lawn. He has done neither of these things. Now the water just flows down the drain pipe onto the ground beside his foundation. This water has no where really to run so it filters down along the foundation and the weeping tile take this water away.

I am concerned that eventually the weeping tile will eventually become plugged or the water around the foundation will freeze and cause the foundation to crack sometime in the winter. His basement is finished and I am worried that this potential leak in the future will cause a lot of damage to his basement. This is one example of something that only takes a few minutes to correct which could prevent a larger maintenance issue for my neighbor sometime in the future.

Routine House Maintenance

There are many other things that are routine and should be completed every year during specific seasons. Cleaning the eaves trough of any debris that has built up will allow the water to drain away properly from the roof and prevent back leaks into the house. Changing the filter on your furnace is another that will provide you with clean air.

Painting your windows on a regular basis will also help to prevent them from flaking and the wood rotting. Many of my neighbors have spent thousands of dollars replacing their windows because they were beginning to leak due to the seals giving way. A little paint would have prevented having to spend thousands of dollars replacing all of these windows.

Changing the oil on your lawn mower and your snow blower annually is another example which would make sure that these engines last a long time. Lubricating various items on these machines following the manual is another great thing to do to keep them running well.

Updating Your Roof

Another big item is replacing the shingles on your roof. Once they are over 15 years old watch for missing shingles or the ends of the shingles beginning to roll up. This is a sure sign of a problem waiting to happen. In both cases leaks can develop which can ruin the insulation underneath as well as ruin paint on walls and even your floors if it is bad enough. Any roof that has standing water on it is a potential problem waiting to happen.

Same goes for standing water around your foundation or on your lawn. If you have this situation make sure that you fill in the depression in such a manner that it drains away properly. This is easy to do and just part of the general maintenance activities that are needed around a home. Most people do not like mowing the lawn, or placing fertilizer on the lawn or grass seed on the lawn to thicken it up. A strong healthy thick lawn fights off weeds and looks healthy, while a lawn that is not doing well, has thin places etc is a perfect magnet for weeds. Keep it healthy to have a great weed free lawn.

Our site has a variety of posts about various tasks that should be followed that will cost little but can save you thousands of dollars in repairs.

Save


Northern Climates – Spring Home Maintenance

Northern Climates - Spring Home MaintenanceMany areas in the northern half of the USA and most of Canada are just emerging from the annual deep freeze of winter. We posted on our blog a check list covering this subject back in March. We thought that it would be a good idea to repeat this post or at least reference it again.  Consumers all through the northern areas of North America and even northern Europe are just now thinking about all of the home maintenance  things they need to do to get their homes ready for the summer time. Most people focus on their yards and the planting of flowers, trimming some shrubs and cleaning up garden beds. But there are many more things that should be considered as part of the spring home maintenance.

A link to the post is – Spring Home Maintenance.  We have a long list that consumers should find helpful. They can refer to this list as they go about the job of getting their homes ready for the summer.

If you are the type that does not like to do this type of work, consider hiring someone to do this work for you. Even though it will cost a bit of money, this is a far better thing to do than to let things go. You will eventually have to spend a lot more money repairing various items around your home  than if you just keep everything maintained. This is where you can really save a lot of money in the long run around your home. Small regular maintenance bills are far easier to handle. Than one large repair job that took place because you did not do the regular maintenance activity.

Spring Home Maintenance – First Steps

The first step that we believe all home owners should consider is to take a walk around their home outdoors and assess if there are any improvements that need to be completed and if there any repairs that need to be completed. Repairs should be at the top of the list to avoid further expense.  For example if there is a piece of siding missing or cracked, it will let water, animals and insects into your home. Take note of these items and repair them as quickly as possible depending on the potential for more damage to your home if they are left un-repaired. In the next paragraph, we discuss an example of what we mean by this statement.

Clearing Eaves Troughs

This is a good example of saving money in the long run. Lets assume that you do not bother with the eaves trough and just leave them full of leaves and other material. The trough will be full of water most of the summer, with the material in the trough rotting away and creating an acidic mixture that over time will eat away at the eaves trough. You will need to replace them far in advance of when they normally should be replaced.

In addition this constant moisture will cause your shingles to deteriorate a little faster in this area. In the fall when it freezes, you now have a heavy weight on the trough. This is due to the snow and ice which over time will cause them to sag. They are now beginning to look ugly. You will have to either replace them or at the very least spend money repairing them.

A few hours a year will avoid this entire cost and aggravation. In addition during a heavy rain, the water coming off your roof will flood your eaves trough and overflow onto the ground below. This totally defeats the purpose of having eaves troughs in the first place. You could even have leakage into your basement if there is a lot of water standing around your basement walls. Water in your basement especially if it is finished, can cause a great deal of damage.

We will keep this post short , but we want to draw your attention to the spring home maintenance list that we prepared a few months ago. A link to the post is – Spring Home Maintenance.

Add your comments. Our readers will appreciate your comments and suggestion of home maintenance that you need to follow-up on.

Save


Home Maintenance Tasks

Home Maintenance TasksEveryone forgets to do the routine Home Maintenance Tasks around the home unless it is something that you have to do every day or perhaps once a week such as taking out the garbage. Usually something is neglected for some period of time and then it becomes a problem that requires a more expensive solution beyond simple cleaning. We will cover a number of situations such as apartment renters, apartment owners, condominiums and single family homes.

We will not cover routine things such as cutting the grass or taking out the garbage. Everyone knows that they need to do these things. What we are looking at are some of the things that should be completed on a quarterly basis, seasonally and even annually around the home to make sure that you continue to live comfortably, safely and inexpensively compared to something breaking down and causing a lot more damage.

These tasks are difficult to remember because they’re so infrequent, but keeping up on the maintenance will not only extend the life of your appliances, it will also help them run more efficiently. To remind yourself to do them, set up email reminders, use a to do list or just making a not e on a calendar. Many smart phones have to do lists or you can down load an app that will help you keep track of these items.

Home Maintenance Tasks That You Should complete Around an Apartment or Apartment Condominium

Whether you’re renting or you own a home, it’s easy to let repeated tasks of home maintenance slip your mind.

The tasks you’re probably forgetting for someone who lives in an apartment are:

  • Flip the mattress (every three months).
  • Replace batteries in your smoke alarm (every three months).
  • Change your water filter (every two to six months).
  • Change your air filter (every two to six months).
  • Clean your fridge coils (once a year) and behind the fridge
  • Wash the windows, at least on the inside
  • Vacuum the vent pipe from the dryer once per year

Home Maintenance Tasks That You Should complete Around a Home

Whether you’re renting or you own a home, it’s easy to let repeated tasks of home maintenance slip your mind.

The tasks you’re probably forgetting for someone who lives in a home are:

  • Check that the drain pan under the cooling coil mounted in the furnace is draining properly and is clean for all air conditioning systems.
  • Lubricate circulating pump on a hot water heating system.
  • Examine the forced air furnace fan belt for wear, looseness and noise.
  • Have your furnace checked every year for faulty components and cleaning
  • Vacuum return air vents and cold air return vents to remove any dust buildup
  • Remove the grills on forced air systems and vacuum inside the ducts.
  • Replace furnace air filters each month during the cooling and heating season.
  • Ventilation system, such as heat recovery ventilator, filters should be checked every two months.
  • Check to see that the duct work leading to and from the heat recovery ventilator is in good shape, the joints are tightly sealed in any depth installation of plastic duct wrap is free of tears and holes.
  • Check smoke, carbon monoxide and security alarms, and replace batteries.
  • Clean portable de-humidifier, if one is used every week.
  • Clean central humidifier every month.
  • Turn off the water supply to the humidifier at the end of the season
  • Check to see that the bathroom exhaust fans are operating properly. Check the airflow to make sure that air is being drawn into the vent and expelled.

Avoid Water Damage

  • Check sump pump and exhaust line to ensure proper operation.
  • Confirm sump pump has no line obstructions or visible leaks.
  • Replace storm windows with window screens
  • Ensure windows and skylights close tightly; repair or replace weather-stripping as needed.
  • Insure all doors to the outside shut tightly, and check other doors for ease of use. Replace your weather-stripping if required.
  • If there is a door between your house and garage, check the adjustment of the self-closing device to ensure it closes the door completely.
  • Remove cover from the air-conditioning units and turn on power in the spring.
  • Insure that the ground around your home slopes away from the foundation wall, so that water does not leak into your basement.

Remove Leaves

  • Clean leaves from the eaves trough and roof and test downspouts to ensure proper drainage from the roof in the spring and the fall after the leaves have fallen.
  • Install outdoor hoses and turn on indoor valves in the spring.
  • Have well water tested for quality. It is recommended that you test for bacteria every six months.
  • If you have a septic tank, measure the slide and scum to determine if the tank needs to be emptied during the summer. Tanks should be pumped at least once every three years.
  • Remove winterizing landscaping material, for example, prepared gardens and if necessary protect young trees or bushes for winter.
  • Set up all lawn furniture, inspect fences and gates for damages or movement due to frost in the spring
  • Rake the lawn, remove all debris from the winter and add fertilizer once the ground is unfrozen
  • Plant flowers, shrubs etc at the appropriate time for your area and climate.
  • Place wire mesh over all potential openings that raccoons and other rodents can use to get into your homes attic. For more info click here

This partial list is a great start for all home owners and anyone who wants to take care of their home whether they rent or not. Good maintenance will ensure you have the lowest expenses over the long term.


Save


Best Window Cleaning Solutions

Best Window Cleaning SolutionsEvery year we clean our windows, usually in the spring and fall. It is a good time to remove the dirt and grime from the windows so that they are glistening and clean. We have wondered what the best window cleaning solutions are and what the best methods are to clean windows? Tomorrow is the big day for me, since I am one of those do it your self guys and do not like to pay for things that I can do myself. It is time to prepare and so I did a little research to find out what the best methods and solutions are.

Safety When Cleaning Your Windows

We have a two story house so I need to use an extension ladder and whenever you are on a ladder it is important to practice safe methods while using a ladder. Always make sure that the ladder is well position and have someone hold it for you while you are on the ladder. Secondly never reach while on the ladder. It is better to get down and move the ladder vs. reaching and throwing yourself off balance causing a fall.

Use a squeegee on a long pole for those hard to reach locations is also a safer way to approach these situations. For some people who are afraid of being on a ladder, you are far better off to just hire someone to clean your windows instead. The cost to clean windows is relatively inexpensive. I just received a quote for $34 / hour and 3 minutes per window which works out to a $1.70 per window which is pretty inexpensive.

Best Window Cleaning Equipment

Assuming you are going to clean you own windows, you will need a pail to hold the cleaning solution, sponge to wipe the glass with and remove much of the dirt and grime and a squeegee to remove the water solution that is left on the windows.

Avoid using something like paper towels. Not only do you have the cost of the towels, it is difficult to carry them on a ladder and you should not rub a window since the dirt on the window is being rubbed around with the towel and if there is grit on the window you can scratch the window. Using a sponge will allow you to rub the window with water and cleaning solution, the sponge will pick up much of the dirt. rinse the sponge at regular intervals and then dry the window using a squeegee just like the professionals do.

Best Window Cleaning Solutions

Everyone has an opinion on what the Best Window Cleaning solutions are. My favorite is water and vinegar, about 2/3 water and a 1/3 vinegar. the vinegar eats into the dirt and grease on the window and once you was and rinse with the sponge you will have a squeaky clean window after you run the squeegee over it. I find this works really well, however there are other opinions.

Other folks prefer to use a mild soap that is good at removing grease. Follow the same steps using the sponge to clean your window and then squeegee it as well. The soap will lubricate the window somewhat and allow the squeegee to glide over the window leaving it streak free and crystal clear.

How Often Should We Clean the Windows

It obviously depends on were you live and how dirty your windows get through the seasons. I prefer to clean them in the spring and the fall so that they are nice and clean most of the year. Note that you must also clean both sides and not just the outside. It helps to have someone cleaning the windows on the inside at the same time. This way you can be sure that you actually have removed all of the dirt from both sides of the windows.

Remember if you are nervous about getting up on the ladder, hire someone to clean the windows for you. It is not that expensive and who knows you might save yourself from having a serious accident. For more information about home maintenance, click here.


Save


Canadian Tire Hours of Operation in Ottawa

We recently have had a lot of people looking for information about the Canadian tire hours of operation in Ottawa. We decided to include a short page on this site to provide that information. Store hours for Canadian tire stores will vary based on location and also if there is a holiday or not.  You should really check with your local store to confirm if they are open.

For example the Canadian Tire Store in Orleans which is just outside of Ottawa on the east side is open during the following hours.

  •            Store                                   Auto Center
  • Mon 08:00 AM – 09:00 PM 07:00 AM – 09:00 PM
  • Tue 08:00 AM – 09:00 PM 07:00 AM – 09:00 PM
  • Wed 08:00 AM – 09:00 PM 07:00 AM – 09:00 PM
  • Thu 08:00 AM – 09:00 PM 07:00 AM – 09:00 PM
  • Fri 08:00 AM – 09:00 PM 07:00 AM – 09:00 PM
  • Sat 08:00 AM – 07:00 PM 07:00 AM – 06:00 PM
  • Sun 08:00 AM – 06:00 PM 08:00 AM – 05:00 PM

Different Hours

Each store will be slightly different. For example the Canadian Tire store in Gloucester, on Ogilvy road which is also part of Ottawa on the east side has the following hours. Each store is independently owned and operated under the general franchise and they keep their own hours based on the market need in their area. This store stays open longer on Saturday nights for example.

  • Store                                   Auto Center
  • Mon 08:00 AM – 09:00 PM 07:00 AM – 09:00 PM
  • Tue 08:00 AM – 09:00 PM 07:00 AM – 09:00 PM
  • Wed 08:00 AM – 09:00 PM 07:00 AM – 09:00 PM
  • Thu 08:00 AM – 09:00 PM 07:00 AM – 09:00 PM
  • Fri 08:00 AM – 09:00 PM 07:00 AM – 09:00 PM
  • Sat 08:00 AM – 09:00 PM 07:00 AM – 09:00 PM
  • Sun 09:00 AM – 06:00 PM 09:00 AM – 06:00 PM

Canadian Tire Hours

We cannot possibly list all of the stores along with their hours, however we wanted to give readers an example of two stores and their general hours. I think that you can be pretty safe in going to any of the Canadian Tire stores between 8am and 6pm. You may want to check with the store closest to you if you need to go to the store after 6pm, especially if you are thinking about getting some work done on a vehicle.

They may have to keep it in the garage over night before they can fix it. Many of the stores will give their customers a ride home under these circumstances. This is a really great service if you have to drop your car off to be worked on and cannot wait for the car to be completed.

Canadian tire is not typically known for selling hardwood floors which is what this web site is all about. It is known for car parts and repairs and of course tires. Recently they have expanded into a broader market offering small appliances, sports equipment, paint, Christmas products etc. They also include including plumbing, electrical and hardware related items for most repairs around the home.

Tools as Well

You can find a lot of the tools that you may need for work around your home at the Canadian Tire store including the tools you may need for laying a hardwood floor. Compare prices and warranties. Some items although they may be a bit more expensive, have a life time warranty on them and this can be valuable for items that are more expensive. this store in Orleans is close to us and we tend to go there a lot to get whatever we need for general items for our vehicle and our home repairs. On top of that, this company is Canadian and we should support Canadian companies who are competing with the big box stores from the US. This is a Canadian Company and represents the very essence of Canada. Let’s support it.

We hope you have found this short post useful. leave us a comment if you did.


Fall Home Maintenance

Fall Home MaintenanceWell, it is mid Oct and it is time for fall home maintenance. Time to get ready in preparation for the winter, especially in northern climates.  Inspect your home on a regular basis. Follow good maintenance practices is the best way to protect your investment in your home during the winter months. Consumers can save a lot of money and frustration by doing this home maintenance.

If you do not feel comfortable performing some of the home maintenance tasks listed below, or do not have the necessary equipment, for example, a ladder, you may want to consider hiring a qualified person to help you. There are many handyman service companies that abound in every city that will do this type of work. If you need general work done, a general handyman is ok and not too expensive. However, for furnace maintenance as an example, you are better off to hire professionals.

Fall Home Maintenance

Performing these checks and steps will not only save you money but will ensure that your home continues to look great. Perform any repairs to any areas that you notice during the performance of your checklist. Here is our list of items to consider on your checklist:

  • Furnace or heating system serviced by a qualified service company every two years for a gas furnace, and every year for an oil furnace, or as recommended by the manufacturer.
  • If you have central air conditioning, cover and protect the outside unit with a tarp or cover that comes with the unit. Turn the power off to the AC so there is no danger of the system running with this cover in place. The cover will protect your outdoor unit from damage from debris, ice, and snow.
  • Lubricate circulating pump on a hot water heating system if you have one.
  • Bleed air from hot-water radiators.
  • Connect the power to the furnace and examine the forced air furnace fan belt, if installed, for wear, looseness, and noise. Clean fan blades of any dirt buildup.
  • Check chimneys for obstructions, such as a bird or squirrel nest, before turning on your furnace.

Remove Dust

  • Vacuum electric baseboard heaters to remove dust.
  • Remove the grills on forced air systems and vacuum inside the ducts.
  • Turn on gas furnace pilot light, set the thermostat to heat, and test the furnace for proper operation by raising the thermostat setting until the furnace starts to operate. Once you have confirmed proper operation, return the thermostat to the desired setting.
  • Check and clean or replace furnace air filters each month during the heating season. Ventilation systems, such as heat recovery ventilators, filters should be checked every two months.
  • Check to see that the ductwork leading to and from the heat recovery ventilator is in good shape, the joints are tightly sealed in any depth installation of plastic duct wrap is free of tears and holes.
  • If the heat recovery ventilator has been shut off for the summer, clean the filters and the core, and pour water down the condensate drain to test.

Check Safety Items

  • Check smoke, carbon monoxide, and security alarms, and replace batteries. Detectors should be replaced every seven years.
  • Clean portable humidifier, if one is used, and install a new foam dispenser.
  • Check to see that the bathroom exhaust fans and arrangements are operating properly. If possible, confirm that you are getting good airflow by observing the outside vent exterior damper which should be held open by the airflow.
  • Check sump pump and line to ensure proper operation, and to ascertain that there no line obstructions or visible leaks.
  • Replace window screens with storm windows.
  • Remove interior insect screens from Windows to allow air from the heating system to keep condensation off window glass. It will allow more free solar energy into your home.
  • Ensure windows and skylights close tightly; repair or replace weather-stripping as needed.
  • Ensure all doors to the outside shut tightly, and check other doors for ease of use. Replace your weather-stripping if required.
  • If there is a door between your house and garage, check the adjustment of the self-closing device to ensure it closes the door completely.

Keep Up with Outside Maintenance

  • Ensure that the ground around your home slopes away from the foundation wall. Avoid water collecting against the wall and does not enter into your basement.
  • Clean leaves from the eaves trough and roof and test downspouts to ensure proper drainage from the roof.
  • Drain water from outdoor hoses. Clean interior valves to outdoor hose connection and drain the hose bib ( exterior Faucett), unless your house has frost-proof bibs.
  • Have well water tested for quality? Test for bacteria every six months.
  • If you have a septic tank, measure the slide and scum to determine if the tank needs to be emptied before the spring. Tanks should be pumped at least once every three years.
  • Winterize landscaping, for example, store outdoor furniture, prepared gardens and if necessary protect young trees or bushes for winter.

If this list appears a bit daunting, schedule an activity every day. You will be surprised at how quickly it is finished. Comments are welcome concerning anything that we might have missed.

Save


Cleaning and Caulking Shower Tiles

Cleaning and Caulking Shower TilesCleaning and caulking shower tiles is potentially a big money saver if you follow a regular maintenance schedule. Showers are exposed to regular moisture contact and as long as the grout between the tiles is complete, no water will penetrate through to the drywall behind. The moment that even a small pin hole is created, moisture starts to penetrate through the pin hole, causing the drywall to swell and once it penetrates the drywall behind the tile, this also expands as well. We have added a couple of pictures to show the kind of damage that can result from just a little bit if water getting behind the tiles and causing the drywall behind the tiles to expand.

Cleaning and Caulking Shower Tiles

Expansion of either the grout or the drywall will cause the tiles to begin to shift and be pushed outward, which may cause them to crack or to even fall off the wall in particularly bad situations. Once this happens you are into a major repair which can cost thousands of dollars. This is why it is so important to check your tiles and the grout between them at a minimum of once every 3 months. Look for small areas were the grout is loose or has fallen out and replug with new water proof grout. Patching like this will prevent water from penetrating behind the tiles causing damage to your shower walls. Consumers can patch these small holes with a show patching compound sold at most hardware stores. It only costs a few dollars and yet it can save you thousands of dollars in repair costs.

Checking Your Tile Grout in Your Shower

This is an easy job and only takes a few minutes to check your shower. I use a toothbrush to rub any suspect areas and also clean the grout if needed. Most times there is nothing to do, since the grout is solid and there are no observable gaps. But every once and a while, I have found areas were the grout has actually fallen out from between the tiles. They can be as short as a quarter inch long, while others are as long as an inch. Either way you must plug these immediately to avoid long term expensive damage.

Repairing the Missing Grout

I use a tube of silicon grout that I squeeze into the hole were the grout is missing. It is the same color as the existing grout, however because it is silicon, it does have a different texture from the existing grout. I am ok with this, since I am mainly worried about the leaks more than the look. Besides there is not that much difference in the grout that is there from the silicon grout that I put in. You can pick up a tube of this silicon grout from most hardware stores as well as plumbing stores. A $5 tube is infinitely better than many thousands it will cost to repair a shower. Of course once you start the shower, it usually means that you redo the entire bathroom, tub, sinks, toilet, mirrors, flooring and paint.

Delaying this huge cost as long as possible is a no brainer as far as I am concerned! Follow the instructions on the tube, making sure that you dislodge any grout that is loose between the tiles first. Let it dry for 24 hours and you can use your shower again.

What are the Costs to Fix the Show Tiles

Let’s assume that you don’t bother to perform this routine check and repair every 3 months. Your tiles are dislodged and about to fall off. It looks really bad and there is also black mold forming on the grout and even in the tiles. Your spouse decides that not only do they want the shower fixed, they are going to update the entire bathroom! What will this cost.

Of course the cost will be design dependent and also dependent on whether you do the work or you hire professionals to do the work for you. My neighbor is the type that does not do the 3 month check ever! He also does not do anything himself, so he is forced to hire people all of the time. He has estimates for updating his bathroom that are in the range of $25,000 to $30,000! Can you imagine spending this much money on a bathroom?

Get off your chair and check the bathroom shower tile right now and make the repairs immediately. You will save many thousands of dollars by doing this simple activity!

Comments are welcome about this subject and others.


Save


Spring Home Maintenance

Spring Home MaintenanceAs we prepare this post, the days are getting longer and depending were you live the snow may beginning to melt which indicates that spring is just around the corner. It is time to take stock of your home and note any damage that might have occurred around your home during the winter months. Winter can be hard on a home, your plants and out buildings, so this is a good time to plan all of your spring home maintenance tasks.

Inspecting your home on a regular basis and following good maintenance practices is the best way to protect your investment in your home. If you do not feel comfortable performing some of the home maintenance tasks listed below, or do not have the necessary equipment, for example a ladder, you may want to consider hiring a qualified any person to help you. Even if you are going to do some of the more minor spring maintenance activities always complete your work with safety in mind.

Spring Home Maintenance Checklist

Here is our checklist of items you may want to look at:

  • If you have central air conditioning, make sure the drain pan under the cooling coil mounted in the furnace is draining properly and is clean.
  • Lubricate circulating pump on a hot water heating system.
  • Bleed air from hot water radiators.
  • Disconnect the power to the furnace and examine the forced air furnace fan belt, if installed, for wear, looseness and noise. Clean fan blades of any dirt buildup.
  • Vacuum return vents and cold air return vents to remove any dust buildup
  • Remove the grills on forced air systems and vacuum inside the ducts.
  • Check and clean or replace furnace air filters each month during the cooling and  heating season. Ventilation system, such as heat recovery ventilator, filters  should be checked every two months.
  • Check to see that the duct work leading to and from the heat recovery ventilator is in good shape, the joints are tightly sealed in any depth installation of plastic duct wrap is free of tears and holes.
  • Check smoke, carbon monoxide and security alarms, and replace batteries.
  • Clean portable de-humidifier.
  • Clean humidifier and turn off the water supply
  • Check to see that the bathroom exhaust fans and arrangements are operating properly. If possible, confirm that you are getting good airflow. Observing the outside vent exterior damper which should be held open by the airflow.
  • Check sump pump  and line to ensure proper operation, and to ascertain that there no line obstructions or visible leaks.

Do not Forget the Windows

  • Replace  storm windows with window screens
  • Ensure windows and skylights close tightly; repair or replace weather-stripping as needed.
  • Insure all doors to the outside shut tightly, and check other doors for ease of use. Replace your weather-stripping if required.
  • If there is a door between your house and garage, check the adjustment of the self-closing device to ensure it closes the door completely.
  • Remove cover from the air-conditioning units and turn on power.
  • Insure that the ground around your home slopes away from the foundation wall, so that water does not enter into your basement.
  • Clean leaves from the eaves trough and roof and test downspout to ensure proper drainage from the roof.
  • Install outdoor hoses and turn on indoor valves.
  • Have well water tested for quality. It is recommended that you test for bacteria every six months.
  • If you have a septic tank, measure the slide and scum to determine if the tank needs to be emptied during the summer. Tanks should be pumped at least once every three years.
  • Remove winterizing landscaping material, for example, prepared gardens and if necessary protect young trees or bushes for winter.
  • Set up all lawn furniture, inspect fences and gates for damages or movement due to frost
  • Rake the lawn, remove all debris from the winter and add fertilizer once the ground is unfrozen
  • Plant flowers, shrubs etc at the appropriate time for your area and climate.

We hope that this list helps you in the maintenance of your home. Doing some or all of the above will help to prevent serious problems from occurring. Over time this will cost you much more money and time if you do not do this maintenance. If any of our readers have comments or additional ideas, please feel free to leave a comment.

Save


Electrical Work Around the Home

Electrical Work Around the HomeMany people are afraid to make any changes to anything to do with electricity around the home. They should be careful  and if they do not know what they are doing, should really call an electrician in to make any changes or adjustments to wall switches, lights or electrical circuits. After all, making a mistake can be costly in terms of money as well as personal injury. At the same time calling an electrician to change a wall switch or to replace a ceiling fixture can also be very expensive. This is a pretty easy example of electrical work around the home. For them it is an easy job and takes 20 to 30 minutes to complete along with travel time. So it is profitable time spent for an electrician, and an expensive hour for the home owner.

Electrical Work Around the Home

There are basic rules to follow when doing any kind of electrical work around the home. We will cover these rules in our post, however please call an electrician to do some of this work if you do not know what you are doing or are nervous about working with electricity. If you do not know what you’re doing, then hire an electrician.

Turn the Power Off

This is the most basic of rules and applies in every situation that you as a home owner will every be involved in. Always turn the power off your self and test the circuit to make sure it is not live before doing any work. In my younger days, an older person was emphatic that he had turned the power off. Fortunately I had been trained to always test that the circuit is not live before doing any work, so I touch the bare wire against the back of a stove first and saw the sparks fly!

Always do it your self! Pull the fuse, turn the circuit breaker off and make sure that there is no power on. I always turn on a light or some device on the circuit I am going to work on and them pull the fuse. When the light goes out, I know I have the right circuit and there is no power going to that switch or light that I am going to work on. Pretty simple, but it works and I avoid lots of other problems when I am doing electrical work around the home.

Match the Colors

Another tip if you are planning to do the work yourself is to always match up the colors. This means connect the white wire of the lamp with the white wire of the feed circuit. The black with the black. Always attach the ground wire which is usually green to the metal box that you are attaching the lamp or the light switch to. If you match the colors you usually cannot go wrong, especially for the simple jobs.

Ground the Circuit Properly

The circuit should always be grounded properly. If you do not know how to do it, then hire an electrician. Follow the rule above and connect the green wire to the metal housing of the box. When your home is wired by the builder, all electrical outlets are grounded. All Switches and lights and plugs have a ground wire. Which should be connected to this metal box to ensure that the lamp etc is also grounded.

Test your Connections

Once you have connected the wires either with a Mar connector or by attaching them using a metal screw to a connection post, give the wire a good tug to make sure that it is secure. If it is loose redo the connection to make sure that it is solid. Once all of the connections are made, turn the power on and make sure that it works as planned. If it does not operate properly, turn the power off. Re-check the connections including the light bulb if you are connecting a lamp of some sort.

Avoid touching Bare Wires

Even if you are confident that the power is turned off. It is always a good idea to get into the habit of not touching the bare wires. Secondly if you have to touch a bare wire, never touch both bare wires at the same time. Do not ground yourself in some manner. With the power turned off, you should not have to worry. But some day you might just make a mistake and leave the power on. Following this rule will give you another level of protection!

If in Doubt Call an Electrician

After all of this, if you feel uncomfortable, spend the money and hire a certified electrician to have the job done right. Your house will be safe, you will be safe and there will be no doubt about any accidents or accidental fires from bad connections.

Electricians may cost as much as $100 an hour, but when you consider the alternative, the money is nothing compared to a burn or electrocution.

We invite comments from readers and suggestions on our blog. Feel free to make comments, however spam comments will be deleted. Also negative comments or obnoxious comments will also be deleted.

Enjoy our blog and look for more to be added every few weeks.

Save


Save Money-Auto Oil Changes & Servicing

Auto Oil ChangesYou may be tempted to perform your own Auto Oil Changes on your car or truck to save a few dollars. All we can say here is to make sure you know what you are doing before you make the attempt. Practice safe working conditions. Use the right tools, use the right oil, replace the oil filter each time, and dispose of the old oil properly.

We will cover each of these items in more detail. However, unless you are prepared to follow safe working conditions, do not attempt this.  Too many people have been hurt, even killed by their cars and trucks while doing their own maintenance to save a few dollars. It is just not worth it if you do not know what you are doing and hurt yourself badly. If your car is not supported by stationary jacks and also prevented from rolling, you could get crushed by your own car.

Auto Oil Changes – Canada

Auto Oil changes in Canada routinely cost from $35 to over $50 depending on the make and model of car. I just had the oil changed in my car at the dealer and it cost $53. However I had a free coupon for the oil change, otherwise, I would never have gone back to the dealer for an oil change.  There are other locations to have your oil changes such as Mr. Lube which are cheaper but still over $40 in price. At these prices, it can be worth it to change your own oil. However, in the United States, our experience has been much lower prices. They are in the range of $20 to $30, sometimes with a free car wash thrown in!

Safe Working Conditions

This is the most important section. If you screw this up it could be your life you lose! With most vehicles, they need to be jacked up sufficiently to allow you to slide underneath. You need to be able to undo the oil pan plug to remove the oil from the oil pan.

This is the dangerous part. If you need to jack up the auto in any way, always add safety support in the form of safety jacks. This is to protect you if the main jack gives way, you have additional support for the car. Make sure the parking brake is on and the car is in gear in the case of a standard and in park in the case of an automatic. You do not want the car rolling while you are under it. Also, place a block in front and behind the rear tires as an additional precaution.

Once you are confident that the car is well supported, gather all of the tools that you will need and make sure that everything is in readiness. You want to minimize the time you spend under the car or truck. Some trucks will not need to be raised, since there is enough space between the ground and the oil pan for you to get underneath.

One final item, remove the keys from the ignition and do not allow anyone in the vehicle while you are working on it or underneath it. You do not want any accidents caused by someone playing and accidentally releasing the parking brake etc. Absolutely no one should be in the vehicle while you are working on it.

Use the Right Tools

The tools are pretty simple. A socket wrench to remove the oil plug, a pan to catch the oil, a container to place the used oil in, a new oil filter, and the tool you need to remove it. Finally, a funnel to use to pour the clean oil into the engine. Don’t try to make do with inferior wrenches. You will likely strip the oil plug.  Never allow the oil to drain onto the ground or onto your garage floor. This makes a terrible mess and it is not good for the environment as well.

Disposing of the oil should also be completed properly. Take the used oil to a dealer that accepts old oil or take it to your community disposal site for paints and oils. This is by far the best way. They will make sure that it is disposed of properly.

Auto Oil Changes – Use the Right Oil

Most engines in most climates use 5 W 30 oil, however, there are many types available as well as synthetic oils that.  As a minimum, review your user’s manual for the recommended oil that you should use in your engine. If you have any doubts or want to try something different such as synthetic oil, consult your dealer for the recommended oil that can be used. It is just not worth it to save a few dollars using cheaper oil. Repairs to your engine can be in the thousands of dollars!

Replace the Oil Filter

Always replace the oil filter each time you change the oil. The oil filter is supposed to capture impurities that might find their way into the oil. You do not want them staying where they could reenter the engine oil circulation system. Empty the engine oil first and then remove the oil filter being careful to not allow the oil in the oil filter to drip in the engine or onto the floor.

Always replace the oil filter with a recommended brand. This way you will know that you have a good quality oil filter. Sometimes you may find others that are cheaper, however, just make sure it is recommended for your car and accepted by your dealer. This is one of the few times we will recommend spending more money on a quality product. The risk and cost of ruining your engine is just too great and too expensive!

Dispose the Old Oil Properly

We are all into conservation and the green movement and so we should. Take your used oil to a recognized facility that will accept it and dispose of it properly. Every community has a facility like this these days, although they may be at specific times of the year. Some dealers will accept used oil, especially if you purchase the oil filter and oil from them. You should really talk t them first and not just drop it off. After all they have to pay a fee to dispose of the oil and it is not fair to them to just drop it off.

We hope that this post is a benefit to many people and helps you save a few dollars. However, do not try to save a few dollars if you are not also going to practice safe work conditions. Don’t risk your life or a major accident to save a few dollars. Comments on the post greatly appreciated.

For ideas about maintenance, around your home, click here.


Maintaining Your Garage Door

Maintaining Your Garage Door is probably one of the last things you think about doing, however checking your garage door every 3 months can in fact save you a major repair bill or sometimes even having to replace the entire door. The garage Maintaining Your Garage Doordoor consists of several major parts. There are the panels which everyone sees, there are the rollers that slide inside the steel tracks and there are the steel springs which acts as counterweights and make it easy for you to lift the door to open it. These same weights will also stop the door from closing too quickly from it’s own weight. Many people will also have a garage door opener as well which opens or closes the door at the press of a button.

Maintaining Your Garage Door

Each of the panels are attached to each other by hinges which are bolted together and the rollers are held in place by clamps which are also bolted to the panels. So what are the basic maintenance things you need to do and why do you need to do maintenance at all on a garage door?

Catastrophic Failure of a Garage Door

Occasionally, I have seen doors come off the tracks and when powered by a garage door opener, the door continues to move and will get horribly bent out of shape. This situation can occur when the hinges become loose and separate from the panels or when the rollers which are held in place also fall off due to the bolts also becoming loose and falling away from the door. The garage door will quickly be pulled off course and as a result will be bent out of shape!

When this occurs there is very little chance that you will be able to restore the door to its original shape and will then need to invest in a new one which can cost hundreds of dollars. If you are lucky, the door will not bend and you can reattached the loose bolts, hinges and rollers and be back in business

How to Avoid Garage Failures

Routine checks are all it takes to avoid the above catastrophic failures. Start by checking each hinge on your door to confirm that the hinges and the bolts are not loose. If they are loose, use a suitable wrench to tighten up each bolt to ensure they are secure.

Next check each of the rollers. Make sure they are inside the tracks for both sides of the door and run freely inside these tracks. You may want to disconnect the automatic garage door opener from the door so that you can move the door by hand easily. Check your manual for the correct lubricant and add sufficient lubricant to the rollers to help them easily move back and forth in the tracks. Check the bolts that hold these rollers in place and make sure that they are all tight and secure. If not, tighten each one until they are secure and then recheck that the door moves freely in the tracks.

Check the Springs

A word of caution is in order for this aspect. These springs are high tension springs and depending on the location of the door can be extended increasing the tension levels. Check the springs and cables for any deterioration such as rust or fraying.  Sometime there will be surface rust, which you can ignore in most cases.  If any of the cables are frayed you should really make arrangements to get these fixed quickly before they fail and cause more serious problems.

Lubricate with Oil to Reduce Corrosion

This last step really depends on were you live. If your garage door is exposed to corrosive elements such as salt, particularly in the winter.  Salt filled snow can be tracked into your garage by your car. When it melts it runs out the opening of your garage. The salt water mix will come in contact with the bottom of your door. As with cars, the garage door will start to rust as the steel comes in contact with the salt water mix.

Consumers can purchase the same type of oil that is used to lubricate cars. This will help it resist corrosion in northern climates were salt is used on the roads. This oil comes in an aerosol can. It should be sprayed along the bottom inside of the door. This oil will spread and penetrate any surface scratches. It will protect the door from the effects of the salt.

Spraying on a regular basis will help to prolong the life of your door. Spraying with oil will delay the eventual corrosion that will take place.

Summary

These steps are relatively simple to do. If followed up on a regular basis will help to prolong the life of your garage door. These simple steps can ave you hundreds of dollars.

  • Check all hinges and bolts, tighten as required
  • Check all rollers and bolts, tighten as required
  • Review springs and cables for corrosion, replace as required
  • Spray bottom of garage door with preserving oil to delay the effects of salt corrosion.

Our next post will be about the garage door opener itself. We will cover how you can maintain it to ensure it lasts longer and save you money.

Feel free to leave your comments and suggestion. For a lot more maintenance details on how to maintain your home and save money, click here.

Save


Paint Your Windows

Painting your windows is one of the most important home maintenance activities  you can do for your home and for yourself. Many new homes are now built with vinyl frames and you do not have to paint them. Older homes, though still have Paint your windowswooden framed windows. Unless you paint your windows and give them the proper care, they will succumb to dry rot or wet rot from the elements. If you have ever had to replace windows, then you will know just how expensive they can be to replace. Depending on the size of the window, they can cost from as low as $200 to $1000 for larger windows. Complex windows can cost even more. Doing an entire home can literally cost thousands of dollars which most of us cannot afford. The alternative of paint your windows is far cheaper. Paint Your Windows is definitely the way to go.

What Happens if I Miss Even One Year

The answer to this question really depends on were you live and which direction your windows face. Believe it or not, the amount of sun your windows receive and the number of heating / cooling cycles your windows experience, have a huge impact on how long the paint will last on your wooden window frames.

Typically southern facing windows will undergo more heating and cooling cycles. The result is that the paint will after time, begin to bubble and break off. If you live in a location were you have freezing during the evening and above freezing during the day, the water will eventually get under the pain, then freeze causing the paint to bubble off. Even within one year the paint especially on the window sills can lift off exposing the wood to the elements and will begin to deteriorate very quickly.

We have found that vertical surfaces will be fine, while the horizontal surfaces such as the window sills will lose some of their paint exposing the bare wood in just 12 months. Once the wood is exposed or water can get under the paint, the wood frame of your windows is going to deteriorate and begin to rot. It might take only a couple years and your wood window sill is soft and not insulating the window in the manner that it should.

How Should You Paint Your Windows

If you really want your windows to last a long time and to avoid misting up between window panes, you need to take care of them. You may be able to get away with just painting the window sills each year and the rest of the window every two years. Some people will say you can go for 5 years, however do not believe them. You will be replacing the entire window within 15 years if you follow that rule.

Start by checking each window and scraping away any loose paint that appears ready to bubble up or is loose. Once you complete this process, you will know how much of the window you will need to paint.

If you need to paint bare wood, it should be dry and you should use a primer first before painting with the proper outdoor paint.  Give the window you are painting a coat of paint, allow it to dry and then apply a second coat of paint. If you only paint the window sills, make sure that you have a good match in color. Even if using the same paint, it may be a different shade if there is a lot of fading due to the sun.

What if I am Afraid of Heights

Many people are afraid of heights and are not comfortable being on a ladder. Don’t take chances to save a few dollars. It is just nor worth it, especially if you have an accident and break something when you fall off the ladder.

Hire a window painter to do the job, but make sure you understand what kind of a job they will do. Some will just paint over the bubbled parts and it looks great for a little while , then the paint peels off within a few months and you have bare wood.

Make sure they will scrape first, then prime and then paint. Inspect their work at each stage and if your not satisfied, get them to do it over again. Before they start make sure there is a clear understanding of what work will be done, how it will be done and that you will be inspecting.

There are many door to door companies going around painting. Some are good while others are not. Choose with care and ask for references.

Paint Your Windows – Summary

Check your windows every year for evidence of peeling and bubbling. Scrape first , then prime and then paint. If your concerned about climbing a ladder, hire a contractor, however be specific about your needs. A poor job is not worth doing at all will give you a false sense of confidence. If you can do it yourself, you will save hundreds of dollars and if you take care of your windows every year you will save thousands of dollars!

Save


Lawn Mower Maintenance

Most urban homeowners own a lawn mower and use them one a week to mow their lawns. Which are usually not very large in urban areas. Lawns in rural areas or estate sized lots may have large Lawn Mower Maintenancelawns and consumers may use riding lawn mowers instead. Regardless of how often you cut your lawn and how big your lawn is, the engines and the cutting surfaces should be maintained on a regular basis. Failure to look after these machines usually ends up with repair costs and / or needing to purchase a new lawn mower. Poor lawn maintenance, especially a dull lawn mower blade can cause your lawn to have a clipped torn look to it.  The situation also creates opportunities for mold and other diseases to enter your lawn.

A new lawn mower can cost over $200 and the more expensive ones can cost well over a thousand dollars. Either way most of us do not have money to throw around and who wants to buy a new lawn mower every couple of years.

There are basic things that need to be done to ensure that your lawn mower will last 10 or even 20 years. Mine is going on 23 years and the only thing I have replaced on it is the spark plug! So what is the secret.

Lawn Mower Maintenance – Change the Oil

A bottle of engine oil, an adjustable wrench, an oil reservoir all of which might cost you $20! And the ability to change the oil in the engine at least once per year. Once you have the tools, the oil only costs $4 or $5 per year.  You can take the lawn mower in to have the oil changed but you will probably pay something in the neighborhood of $50 to $75, which will include an oil change and also sharpening of the blade, and checking the status of the spark plug and also the spark plug gap. I would rather do it myself and save the $75.00!

Change the oil regularly, at least once a year and check the oil level prior to starting the engine each time. Your lawn mower will last many years with this basic level of maintenance and save you hundreds of dollars!

One word of caution. Always disconnect the spark plug wire if you plan to do any work on the engine to avoid any possibility of accidents. Follow the guidelines in the manual and make sure that the oil drain plug is securely tightened to avoid any possibility of oil leakage. Finally dispose of your old oil properly by taking it into an oil disposal facility.

Other Basic Things to Do

A variety of things could cause additional expenses when it comes to your lawn mower. You can avoid these with simple activities and prolong the life of the deck and the wheels. We have talked about the engine and changing the oil, however there are other things that can and should be done.

For example, use gasoline freshener. There are many trade names, however basically they are additives that will keep the gasoline fresh. They help to avoid gumming up of some of the smaller parts in the carburetor. Especially over the winter when your lawn mower is not used.

Check the air intake and try to keep the air filter clean. This ensures maximum air intake, clean burning of the gasoline and smooth running of the engine.

After every time you use the lawn mower, clean off the deck and the underside of the deck. Build up of grass clippings on the deck and the underside can  cause the metal of your lawn mower deck to deteriorate. This will take several years. Most consumers may not even notice it until it is too late. Keeping it clean will avoid buildup of grass clippings. More importantly eliminate the acid that eats into the metal of the lawn mower deck.

Summary

Change the oil on a regularly basis and keep the air filter clean. Use gasoline freshener and keep the metal housing clean and free of grass clippings. Perform all of the maintenance yourself following the guidelines in the manual. If you are unsure about something you can always talk to your local small engine mechanic to get some advice. Most will be glad to help you provided that you purchase the needed parts from his or her shop!


  • Copyright © 1996-2010 Managing Home Maintenance Costs. All rights reserved.
    iDream theme by Templates Next | Powered by WordPress