We just finished installing good neighbor fencing along one side of my lot. The existing fence was 25 years old and needed to be replaced. As well, my neighbor wanted to also replace it and since we share it between us, this meant that not only would he help me build it, he would also split the cost of the fence as well.
We decided on a traditional good neighbor fence, with a lattice at the top to add additional privacy and decoration. We also decided on a pre-built fence section which means the bottom part was built with a boxed-in effect using two by fours and the same approach for the lattice. The picture shows this superior fence. Using the two by fours as a box makes this fence a much stronger and sturdier fence. The good neighbor fence is vertical boards on opposite sides of the fence to allow the breeze to go through and to provide a more open look. More detail is provided in the following paragraphs.
Good Neighbor Fencing
Whenever you are building fences that are between neighbors there are several rules that apply in order to maintain good relations:
- Always split the cost of installing the new fence
- Always agree to design, style, price, and any construction details before proceeding
- The fence should be on the property line
- If it is a do it your self job, always help each other to build it unless there are health issues
- When one neighbor is going ahead without the other’s consent, it usually means that the cost is not split and the fence should not be on the property line
- If you hire a contractor, always make sure that everyone agrees to price, timing, style, and quality before giving the go-ahead
Good Neighbor Fencing Pricing
We elected to build it ourselves on the property line and split the cost of the materials. We initially requested an estimate from a contractor who gave us a price of $4500 which worked out to a cost of $47 a foot which included removal of the old fence, construction of the new fence, and clean up after construction was finished. This was way too much for us and we decided to build it ourselves. The final cost for doing it ourselves worked out to be $1947 or $20 a foot which was a huge saving. We split the cost equally and so we ended up paying just under a thousand dollars each.
This is a much better fence than we would have had if we had hired a contractor to build it. We compared our fence to others in the neighborhood and not only is there more material in our fence, but it is also much stronger than any of the other fences that have been installed recently.
Compare Pricing for Good Neighbor Fencing
Whether you have someone build it or do it yourself, it is a good idea to compare pricing for the materials as well as labor before you begin. An important factor to discuss is the design of the fence to make sure you both agree on the design, but also how much material will be needed. There are many different designs and they all take different 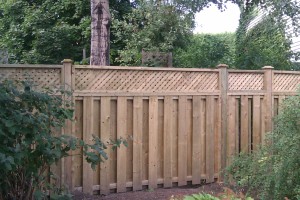 amounts of material which affects the price. We compared pre-built fence sections from two major suppliers and found one to be superior. The superior fence was more expensive. However since we had a quote from the other supplier, the second supplier matched the price. We got a great deal, a superior fence design, quality materials all because we compared pricing. We saved at least $200 in cash and got a better fence!
Pre-built Sections or Build it From Scratch
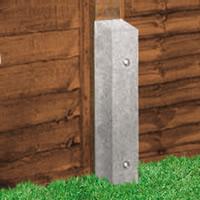
Building a fence either way works well. However, using pre-built sections makes the job go a little faster. It means that you have consistency in the fence design in all sections of the fence. We did not compare pricing, however, with the sale price we received, we were happy with the final price. With a price of $161 for an 8-foot section of fence, we had a very reasonable deal. This includes the 10 foot 4*4 post, sono tube and cement, screw nails, auger to dig the holes. Garbage removal for the old fence is also included. We could have saved some additional money if we had removed the garbage ourselves.
We had to work very hard to remove the old posts and cement. The new holes were dug to at least 42 inches. Once this part of the work was completed, the actual part of the fence building went relatively quickly. Both parties are very happy with the result. Plans are underway to approach other neighbors to build the rest of the fence surrounding our lot the same way.
Save
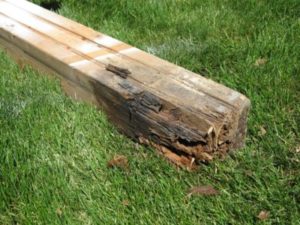 We recently read a post about treated lumber rotting. The writer was surprised that the treated lumber on their deck had begun to rot. They had been assured that the lumber would not rot and would last a lifetime.