 One of the questions that many people have these days is whether they should upgrade their furnace to a new more efficient model. There are lots of incentives that are being offered by the various companies that sell furnaces. There also might be incentives offered by local or state governments as well. One is trying to increase sales while the other is trying to reduce energy consumption. In this post we are not going to recommend one furnace over an other. Instead we are looking at whether you should upgrade or not and what the financial impact might be. What should you consider re a Furnace Upgrade for Your Home
Furnace Efficiency
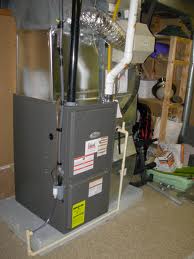
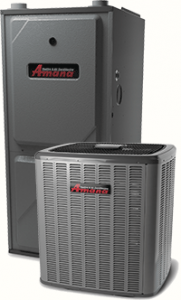
Our old furnace was approximately 60% efficient. Which means that 40% of the cost of gas that we used went up the chimney in terms of heat. This was heat that did not get transferred into the home or in terms of poorly burnt fuel. In 2002, we replaced this furnace with a new mid efficient furnace which at the time cost us approximately $3500. It had a 83% efficiency rating. High efficient furnaces can get into the mid 90″s which is a significant improvement. At the time we made our purchase a high efficiency furnace was running about $5000 installed.
Last year we paid $727 for the entire year to heat our home. did we save money and how long did it take?
Doing the math re Furnace Upgrade for Your Home
You can use our calculations as a model for your own, because everyone’s numbers are going to be different. The $727 we quoted above was for 2011/2012 winter and using our mid efficient furnace. If we were still using our low efficient furnace the cost would have been 727 *.83 / .60 using the numbers that have quoted above, $1005 or a savings of $278 for that year.
We replaced the furnace in 2002 or 10 years ago and therefore we have saved 10 * $278 or $2780 over the ten years assuming that the price of natural gas has not stayed the same. We will ignore this price change for the time being, so it looks like we have another 2.55 years before we break even.
If we had upgraded to a high efficient furnace, we would have saved $351 over the cost of our old furnace which was at 60% vs. 95% efficiency. But our furnace was going to cost $5000, so we would have saved 10*351 over the ten years and we would still have another 4.2 years for the savings to pay for the high efficient furnace.
Payback Terms for Furnace Upgrades
These are pretty long payback time frames for replacing your furnace. If you can secure an incentive of some kind to decrease the cost of the furnace upgrade, or the cost of gas is higher in your area, you may get a faster payback. Aside from making a contribution to the environment, you are saving money as well on your monthly costs.
There are additional savings to be found. In our case we had an AC motor on our old furnace. The new one has a multi speed DC electrical motor which is supposed to be more efficient that the old AC motor. Unfortunately we could not quantify the savings from this change to our electrical bill. Rest assured that is significant and probably shaves at minimum a couple of years off the payback period.
Your vendor should be able to advise what the savings will be which you can then add to your overall gas savings and recalculate the payback term. We think it brings the payback down to less than 10 years time, which is not too bad at all.
All of these calculations apply if you are replacing your furnace because you want to decrease your monthly cost or take advantage of incentives offered by the furnace company or the government.
Your Furnace Breaks
On the other hand of your furnace stops working, then it is a question of how much do you put into repairs vs. buying a new one. Most of the time if you have to put more than $500 into repairs and it is an old furnace, it is time to replace it with a more efficient model.
You may also be faced with exhaust vent upgrades as well to reflect the change in the building code since the last one was installed.
Furnace Maintenance
We did not factor furnace maintenance into any of these equations. They should all be checked once per year and cleaned as well. We assumed the cost is the same regardless of the furnace. However some people would argue that the parts for a high efficient furnace is more expensive than other furnaces.
Good luck with your furnace upgrade. We hope this has helped in your decision making process. Regarding to upgrade your furnace to either a mid efficient furnace or to a high efficiency furnace. For more information about furnace upgrades and renewal, click here.
Save
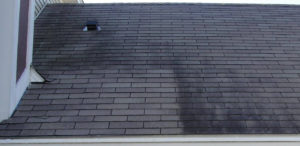 Consumers living in areas with lots of moisture and the little sun will sometimes find black algae growing on the shingles of their roofs. It can turn a beautiful roof into an ugly stained roof that just does not look great even in the hot sun. Once it starts it just continues to spread leaving an unsightly mess on your roof. Fortunately, there is a way for Removing Dark Stains from Your Roof.


 them. Most will last from 5 to 20 years, some even longer without ever being touched, while others will need some sort of repair or adjustment from time to time.