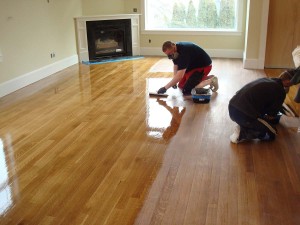
Tag: Hardwood Floor Restoration

Refinishing Hardwood Flooring

Hardwood Floors Installation CostNo one wants to refinish hardwood flooring by themselves. It is a lot of work if you do it yourself and there’s usually dust that just permeates the entire house. This makes for a big cleaning job after the job of installing or refinishing a hardwood floor is completed. Also most people do not have the time to do the job quickly due to work situations and other commitments. As a result a couple days worth of work can stretch into weeks or longer.

At some point it needs to be done if you want your home to look fantastic and be presentable. There is a proper way to refinish hardwood floors that can save you or at least reduce the amount of work that needs to be done. Here’s our suggested step-by-step approach.

Refinishing Hardwood Flooring – Steps

Remove all furniture, window coverings etc from the room

Seal doors and vents to try and reduce the amount of dust that will travel throughout the house. If you have a furnace, central air furnace or central air-conditioning turn this off so that dust is not sucked from the room and blown throughout the rest of the house.

Open windows in the room that the floor is being refinished

Start sanding only in the direction of the grain. If you sand across the grain, there will be scratch marks all over your floor that will be amplified when you apply the stain and/or verathane at the end of the job.

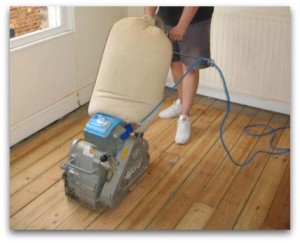
Use a sander that comes with a vacuum to trap as much dust as you possibly can. The vacuum should either exit outside the house through the window or terminate in a bag which you need to empty often.

Use an inline sander, never an orbital sander to avoid leaving marks across the grain

Vacuum up all saw dust once you’re finished sanding to get as much dust as possible out of the room.

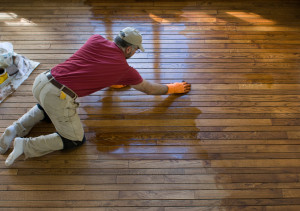
Wipe up all dust with a tack cloth to remove all dust and avoid leaving marks on your refinished hardwood floor.

Apply several coats of finish. Sand in between each coat. Use your tack cloth to capture all dust that is left by from sanding the floor. Once these steps are completed, you should have a really great looking floor that adds value to your home

Refinishing Hardwood Flooring – Summary

The last point that we wanted to offer readers is to suggest that if you are unsure about something, speak to experts at the hardware store where you purchase you materials. They will often offer classes to help people learn how to refinish floors and other home renovation projects. These can be quite helpful and are usually free to people who sign up.
How to Refinish Hardwood Floors Yourself

How to Refinish Hardwood Floors YourselfThe following are the concise steps that you need to follow when  planning on how to refinish hardwood floors yourself. We also suggest that consumers speak to a professional before they start to make sure that they are using the right tools and materials. Cleanliness is next to godliness when it comes to refinishing hardwood floors. Do it yourself consumers must remove all dust specks before applying finishing coats.

Otherwise you will have lots of dust specs that will show up in the daylight. This will cause your floor not to look as great as it should. You will also need to sand between coats of varnish or whatever you use to finish your floor. The last coat must be applied to a completely clean floor to avoid any possibility of dust specks leaving marks on your floor.

How to Refinish Hardwood Floors Yourself: Steps to Take

Good luck and follow these steps to refinish your hardwood floors yourself:

  • Remove all furniture & window treatments
  • Tape all vents
  • Open windows
  • Turn furnace fan off
  • Close door and seal
  • Rent power sander with vacuum
  • Sand in direction of wood grain
  • Use progressively finer sand paper
  • Vacuum dust
  • Use tack cloth on floors and walks
  • Treat with appropriate finish
  • Light sanding between coats

How to Refinish Hardwood Floors Yourself: Additional Thoughts

Let it dry for a few days and then move your furniture etc back into the room. This is a lot of work and many consumers must do this work in the evenings and weekends since they must also go to their day jobs.  The job can take several weeks depending on how focused you are in getting the job completed, which means you must also have the support of your family as well.

The room you are refinishing cannot be used during this time period and no matter how hard you try there will be lots of fine dust, that will find its way into just about everything. If someone comes in to do the work for you, the job should be completed within a few days in most cases. Many consumers consider this to be a huge benefit and even though it will cost a lot more money they will hire a handy man to complete the job for them.

This scenario is definitely something to think about. If you hire someone, discuss how they will minimize the dust in the rest of the home. Exhaust fans to the outside, taping the door shut and closing return air vents to avoid dust being sucked into the forced air heating system are examples of steps to take to avoid the dust being circulated throughout the home.


Refinishing Hardwood Floors

Refinishing Hardwood FloorsRefinishing your hardwood floor can be one of the most rewarding things you can do. It can revitalize your home and can add thousands of dollars in value to your home as well. The best part is that you do it yourself and save hundreds if not thousands of dollars in labor. You do not have to hire a contractor to come and do the work for you. The downside is that you do the work and it may take longer than planned. Especially if you are limited to week nights and weekends. But the end result is definitely worth it. Before you begin there are two things to make sure are ready.

Preparing to Refinish Your Hard Wood Floor

First the family must be supportive. This may seem a meaningless item. However if this work may take a few days or weeks. The room you are working on is not going to be available for use during that time, the family needs to be supportive. There will also be more dust in the house than normal. Your spouse must also be on board with a protracted work schedule. If they are not on board, then you may just want to hire a contractor to get the work done quickly with minimal disruption. There is still going to be disruption and dust everywhere. But at least the job will be done quickly although it will be much more expensive.

The next item is to clear the room of all furniture and window treatments along with anything that is on the walls or in the closet. No use having to work around them and also getting dust on everything. You will also want to remove the corner round so that you can sand right up to the wall. If you are careful removing the corner round, you may be able to reinstall it when you are finished. If you are not that fussy about sanding right up to the wall then just leave the corner round in place and sand as close as you can to the corner round.

Assemble all of the Tools You will Need

Decide how your floor will be sanded. If you are using a power sander with an attached vacuum you will be able to at least capture the majority of the dust, but not all.  Do not use an orbital sander since this will cause scratches across the grain. Always sand in the direction of the grain to avoid this sort of scratched look. It will really show up when you varnish the floor or stain the floor. If  you make a mistake you will just have to do some more sanding until those scratches can no longer be seen.

Cleaning is paramount when you are finished sanding. You must remove all dust from the floor and the walls to avoid it showing once you varnish the floor. After each coat of varnish, you will need to do a very light sanding with extremely fine sand paper to remove all of the marks and rough the varnish up just a bit so the next coat will provide a nice smooth finish.

Old hardwood floors when they are refinished add character and value. If your floors are gleaming and looking brand new, your home will be worth thousands of dollars more than it would have without the floors being finished.  Many consumers will hire contractors to do the work for them while others will do the work themselves. It really comes down to support from the family, how much time you have vs. how much a contract will cost to do the work for you.

Take the time to learn how to do the job properly so that your time and work is not wasted! And you will have fantastic hardwood floors in your home.


Refinish Hardwood Floors

Refinish Hardwood FloorsMost consumers should consider refinishing their hardwood floors. Why refinish hardwood floors? Before replacing them or worse covering them up! You can save thousands of dollars in work and materials. refinish the floors instead of replacing them or buying carpet to cover the floors because they do not look great. Another tactic that many people will use is that they will purchase area rugs to cover the worst areas and the high traffic areas. Not only do you not see the worst of the wear and tear on the floors, you add protection for the floor and you add warmth to the room.

Purchasing a nice area rug to under a coffee table, down a hallway etc is a great addition to your home and will compliment your furniture and décor. Area rugs can be purchased inexpensively and after a year or two changed to something else if you get tired of it or just want something different. They are not expensive and they make a room look great. But we are getting off the topic of refinishing hardwood floors.

When to Refinish a Hardwood Floor

Other than the obvious observation i.e. the floor looks worn and tired looking. So it is time to refinish it. There are some practical considerations to take into account about deciding when to refinish a hardwood floor.

For example a friend of ours just moved into an older home that they purchased. The home has hardwood floors throughout with the exception of the kitchen and the bathrooms. The floors are in average shape. They are not in terrible shape, nor do they exhibit severe stress in high traffic areas. However they certainly do not have that high gloss brand new look that everyone strives for when they move into a brand new home or have the floors refinished.

Initial Plan

Their initial plan was to have all of the floors refinished before they moved in so that they would have pristine high gloss hardwood floors. The job would be easy to do without the furniture in the rooms and the dust to contend with while living in the home. Once they saw the floors after the previous owner had moved out, washed and cleaned then they realized that the floors were ok, not great but ok. Combined with the fact that they have a cat and they have a young daughter with her toys and friends coming and going, they felt that it might be better to wait until she got a little older and there would be less chance of a brand new floor being scratched the day they move in.

With the existing floors in their present condition, which is really not that bad, they can be much more relaxed in their home and they can have the floors completely refinished sometime in the future. Instead they will judiciously use area rugs under the coffee table, beside their beds and in higher traffic areas at entrances to rooms. They are having fun picking out these rugs and decorating their home together.

Refinishing One Room at a Time

Consumers can do the work themselves by renting the appropriate equipment and working evenings and weekends. By closing the doors, taping up the vents they can prevent dust from getting into the rest of the house and complete one room at a time. While they have no definite plans at this time to start on any of the rooms this is a good approach to take when they are ready to get started. In the mean time they can enjoy their home and look forward to decorating their home while not stressing about scratching the hardwood floor.

If you are unsure of how to do some of the work, talk to experts or review some videos. There are many other posts on this web site about how to refinish your hardwood floors as well as tips about refinishing floors. Comments are welcome.


How to Refinish Hardwood Floors

How to Refinish Hardwood FloorsHow to Refinish Hardwood Floors. Refinishing a hardwood floor can be pretty straightforward and simple if you know what you’re doing. The most important thing is to make sure that there is sufficient thickness of wood to begin with. There must be enough wood that will support sanding.

Most machines will take or remove one 16th of an inch of wood. This is to ensure that all gouges in the wood are no longer seen. Also that all previous finishes are removed. You must make sure that there’s enough thickness remaining in the wood to allow for one 16th of an inch to be removed. there must be enough to continue providing support to the floor.

Why Do Hardwood floors Get This Way

Floors that are getting thin are the result of many standings over the years. This is true for particularly older homes that have had hardwood floors installed from the beginning. They have had them sanded many times. If you happen to be the person who’s buying an older home with hardwood floors one of the things that you might want to look at is the thickness of the hardwood floor. Particularly if you are planning to re-sand or resurface these floors.

How to Refinish Hardwood Floors

Once you’ve decided to refinish your hardwood floor, always make sure that you sand in the direction of the grain. If you sand across the grain it will leave scratch marks all over your floor. This will basically ruin the floor. In order to get those scratch marks out of the floor you’ll have to remove more wood. Which makes it a lot bigger job for you to complete.

Sending the floor should be done with a belt sander that includes a vacuum. The vacuum will suck up all sawdust and small particles that could permeate the rest of the house making the cleanup job much bigger.We cannot emphasize this issue enough. If you want to avoid dust everywhere, use a vacuum that exhausts outside to remove over 90% of the dust from your home. There will still be some dust to deal with but nothing like there would be if you just allow it to float throughout your home. Also shut off the furnace fan to avoid any dust being sucked into the system and being redistributed through out the house.

Remove all Dust After Refinishing

Once you have finished sanding the next job is to use a tack cloth to wipe up all small particles of dust that could be on the floor. Also wipe the walls, doors and windows. Anywhere there could be fine particles of dust should be cleaned of all dust. The reason that this step must be taken is to avoid any dust remaining on the floor. Avoid it being held in place when you apply varathane or some other finish to the floor. These dust particles will really show up in the daytime light and ruin the look of your floor.

After each coat of varathane has completely dried, a light sanding with very fine sand paper is usually completed. This is to roughen up the floor a little bit and provide better adhesion. After this fine sanding, again use the tack cloth to pick up any particles that may remain. Add a final coat of finish. Then allow to thoroughly dry before placing furniture etc in the room.

Also follow the manufacturers steps outlined on the container for applying your finish, especially if you are applying more than one coat to the floor. Failure to follow the instructions could mean that you will need to re-sand the floor completely and start all over again.

Good luck with your hardwood floor refinishing job and let us know of any additional steps or comments that may be interesting to our readers.


Hardwood Floor Resurfacing

Hardwood Floor ResurfacingHardwood Floor Resurfacing. One of the first things  people will look for are hardwood floors. Many people are shopping for a home and looking at older homes that are up for sale. Many will remark that the hardwood floor will need resurfacing. The hardwood floors look old. They look used based on the fact that much of the finish is worn away. Especially in areas where there is heavy traffic. However other people love this old-fashioned look. They feel that it adds a lot of character to the home. If you are selling your home, it is hard to know if you should refinish the floors or leave them the way they are. Because some people like the used look while some people want everything perfect.

In fact one couple that we met loved our old hardwood floors. They felt that they would not resurface the hardwood floors until the time when their children were older. The floors were not actually that bad, and they were comfortable with the way they were.

Hardwood Floor Resurfacing and Young children

This couple had two very young children. They love to play with her toys on the floors. They were afraid that the floors if refinished and resurfaced would become marked up again very quickly. This was probably true. In fact the best decision they made was not to resurface the hardwood floors at this time. In addition the condition of the floors gave the house that antique look. There is also a lot of character which many people loved when they visited.

Resurface the Floors

The first step is to make sure that there is sufficient wood left on the floor to handle resurfacing. If there is less than 1/8 of an inch of wood left then you probably will have to replace the hardwood floor. A light sanding will remove 1/16 of an inch of wood each time it is sanded. If there are gouges in the wood this light sanding may not remove the gouge. You may also have to remove that section of the floor or the entire floor to gain a brand-new look. This is something that must be taken into account before deciding to resurface a hardwood floor.

Always sand the wood in the direction of the  grain of the wood, never across the grain. If you sand across the grain you will leave permanent marks and scratches that will mar your floor and further it will have to be re-sanded to remove those scratches so they will not be seen. When your happy with the sanding make sure that all dust is removed, use a tack cloth to pick up any small particles of dust. After that you can apply varathane or some other product that will seal the wood, bring out the grain in the wood, and provide a finished look to the wood that will protect it for many years.

Remove All of the Dust

If you do not remove all of the dust and apply varathane or some other product, you are going to end up with all kinds of marks on the surface. Every little piece of dust is going to show on the smooth finish and you will not be satisfied with the look of the floor. Some people will apply several coats of finish to the floor to really provide a protective coat on the floor. When a 2nd or 3rd coats is applied, it is recommended that a very light sanding be completed each time between coats. Make sure that the first coat has dried thoroughly before sanding. Instructions on the container will tell you exactly how many coats to apply and whether you need to sand between coats.

Once it is finished, you will have a beautiful looking floor that you can be proud of.


Hardwood Floors Refinishing

Are you considering hardwood floors refinishing because your floor is beginning to show a lot of wear and tear. Maybe it is due to age or just a lot of traffic. Take the time to investigate how to complete the job without damaging the floor further. Most hardwood flooring stores will put on seminars for those people who plan to do the job themselves. They will show them how to sand the floor properly and make any repairs that may be needed. Of course they want you to rent their equipment and may even give you a discount if you attended the course. Don’t hesitate to ask for a discount. The worst that can happen is that they say sorry, there is no discount. You got the training for free so you really cannot complain too much.

Remove all Furniture

Start by removing all of the furniture from the room and also all paintings or wall hangings along with any window coverings. There will be lots of dust and there is no use getting these things covered in dust as well. We would also recommend that you seal all doorways to other rooms to prevent as much dust as possible from being distributed to other areas of the house. If your furnace is running for air conditioning or heating, you may also want to block the cold air return vents to keep dust from being sucked into the heating system and also be distributed to the rest of the home.

Hardwood Floors Refinishing

Refinish by Hand

If you are refinishing the floor by hand be prepared to use lots of elbow grease. This will be hard work and you will also reduce the amount of wood that is actually removed from the floor and reduce the total amount of dust that is generated. Always sand in the direction of the grain, never across the grain. There may be gauges or marks that you cannot remove with simple hand sanding. Most professionals will just sand the board down until the defect is no longer present.

The problem with this approach is that it removes a great deal of wood. It decreases the number of times the floor can be sanded that a floor can tolerate before it must be replaced. If you can tolerate the marks, then we would suggest you leave the marks. Clean them out if there is any dirt and then reseal it with whatever coating you are applying to the floor.

Belt Sanders

Belt sanders make a faster job and also are much easier to use than a hand sander. The problem with belt sanders is that they can remove a great deal of wood in a hurry if you are not careful. They also remove more wood when they are used on a floor. Operators need to take care that they only remove what is needed to expose bare wood. It can then be treated with a coating of stain and protective cover. Some belt sanders will also come with vacuums that can exhaust the dust outside of the home into a dust bag.

This is a huge advantage because the last thing you want is a lot of dust through out your house.  The dust will get into everything all over the home unless you take some precautions. For example such as using a vacuum while the belt sander is running. The vacuum should also be exhausted outside into a bag that is designed to catch the dust. It should avoid the dust be distributed all over your neighborhood. Most rental companies have this kind of equipment. They can show you how to use them if you are doing this work yourself.

Also be prepared to do some hand sanding as well to get at the corners and other hard to reach locations. Be careful to always sand in the direction of the grain and never across the grain of the wood. Other wise you will end up with scratches across the grain which will not look very nice.


Cost of Refinishing Hardwood Floors

Many people wonder about the cost of refinishing hardwood floors that are many years old. They may have scuff marks, gauges. Perhaps even cracked boards. Installing a new floor is still way in favor of refinishing the older hardwood floor. In addition, many people really like the character of a home with older hardwood floors. They have aged and have an older style look and feel to them. For them the decision to refinish a floor is not difficult. Since they love this character and the atmosphere that an older floor creates.

Hardwood floors will fade over time. Each time you move furniture you will notice that the floor area under the furniture will be a different shade compared to floor area that was exposed to the sunlight. As long as you do not move your furniture, everything is fine. However if you move furniture around you will be faced with a decision. Should you consider sanding and refinishing your floor or perhaps purchasing some area rugs to cover the newly exposed floor areas?

It does not take long for the shading of hardwood floors to change. The sun can really make a huge difference on how fast it will change. If you can protect your floors from exposure to the sun there will not be as much change as quickly.

Refinishing Hardwood Floors

Refinishing the older floors may involve quite a bit of manual sanding since the floor may be uneven and may also have gauges that will need to be repaired separately. Always sand the floor in the direction of the grain and never across the grain. Hand sanding will ensure that you have a nice even look to the floor, although it takes a great deal more work. In addition, you will remove far less of the wood from the floor, whereas mechanical sanders may take as much as an eighth of an inch of wood from the boards.

While it does not seem like much, if an older floor has been sanded many times, there may not be much wood left to sand. A mechanical sander could expose nails and even sand right through the hardwood to the under floor below. Sanding by hand is far safer and delivers a nicer job on older floors, although this type of sanding tales more time and effort.

Replacing a Hardwood Floor

If you decide to replace the floor, the existing hardwood must be removed. All nails and any other debris removed. Make any repairs to the supporting floor underneath that may be required. Most experts will suggest that there should be at least five eighths plywood to support a new hardwood floor. This will help to ensure that there are no squeaks in the floor when you walk across it. The cost of removal of the old floor, clean up and preparation of the base floor, placement of the sub floor for support and then installation of the new hardwood floor is usually much more expensive than sanding an older floor.

Evaluate both alternatives and request estimates for both solutions before making a decision. You can them make an informed decision about which direction is best to take with respect to your new floor. In addition, if you can do some or all of the work yourself, the cost of refinishing a hardwood floor will be much lessl. Consumers can save a great deal of money by refinishing the hardwood floor themselves.

Many people enjoy the ambiance and the character of an old floor. It still retains its color and texture from years ago. In addition you still want to be careful on the floor with furniture etc to not scratch it. However there is less concern about the floor since it already has marks from years of use. Many consumers prefer this decor vs. having one that is perfect and must be treated carefully every time you walk on it.


Resurfacing Hardwood Floors

Resurfacing Hardwood FloorsResurfacing hardwood floors is often best left to the professionals for a number of reasons which we will go into in this post about this particular topic. All consumers want to try to save some money. Some have the time to do the work themselves. However many just do not have the time, the skills or the patience to do the work. If you are planning to try resurfacing hardwood floors yourself, the first thing you need to do is to talk to the experts. Learn a few tricks of the trade. Then you need to have the time and patience to do the job . Also a supporting family who can put up with the mess for a few weeks. Unless you plan to take vacation to complete this project within a few days.

Finish the Resurfacing Job Quickly

Hiring a professional usually means that the job can be finished in three or four days. Of course this depends on the size of the job. Sure your home is a mess during this time. But then the job is done. You can put your furniture back and relax to enjoy your brand new floor. This is usually what most people aim for and you really cannot blame them. Who wants to do all of that work and have a mess too that lasts for several weeks?

It Takes a lot More Time to Do It Your Self

The writer has done a lot of these kinds of jobs on his own.  I have saved a great deal of money doing it as well. The problem that we had is that it took a long time to get the job done. Only being able to work on resurfacing the hardwood flooring for a few hours at night before the kids went to bed. Also on the weekends really extends the project completion date. In addition my family had to put up with all of the dust in the house. Of course the furniture totally rearranged so that the work could be done. It took me a couple of weeks to complete the job. But I saved several thousand dollars by doing the job myself.

Rent the Right Equipment

Always sand with the grain of the wood and never across the grain. Always rent a machine that will do the sanding for you and has a vacuum attached to such as much of the dust as possible into a bag or entirely outside. This can significantly reduce the amount of dust inside the home and make a huge difference in the clean up afterword.

You will have to do some hand sanding to get into corners and areas that the power sander cannot get to. In addition, removing the corner round and then sanding right up to the wall can reduce the amount of hand sanding that needs to be done.

Sand with progressively finer sand paper to leave a very smooth finish and then vacuum and clean the wood before applying the stain or protective coats to the wood. You may want to wash the walls first to remove all sawdust that has attached to the wall. Clean the floor last with a tack cloth to remove any sawdust that could mar the finish on your floor. When you are finished you will have a floor that looks brand new and add thousands in value to the price of your home.

When consumers are buying a home, they will not take on the job of sanding a floor. Unless they can really get a low price for the home. It has to be low enough that they can afford to pay for the refinishing job. Most sellers would prefer to have the work done and live in the home for a while. For more information about hardwood floor refinishing, click here.

Save


Refinish Hardwood Floor

Refinish Hardwood FloorThis hardwood floor needed to be refinished in a really bad way. There was nothing wrong with the wood. However the surface was scuffed up. The finish was coming off or has worn off. There are marks on the floor from either furniture or possibly rugs that were placed on the floor to cover the not so good looking floor. This floor was refinished and made to look almost like new. So it is well worth taking the time to refinish it. Instead of covering it with a wall to wall rug. Some consumers will do this to avoid the work. They may also prefer rugs to hardwood floors as well which is fine. Everyone is entitled to their own personal taste.

Refinish Hardwood Floor

We happen to like hardwood flooring for a number of reasons. First of all they look great, but they also keep the dust down. They do not hide the dust the way a carpet does. Anyone with allergies will always do better with a hardwood floor vs. a wall to wall carpet.

How to Refinish a Hardwood Floor

If you plan to refinish the floor yourself, it is important that you do it properly. Renting a power sander is probably the easiest way. Provided that you rent the correct one. Also when you are sanding, you make sure that you sand with the grain and NOT across the grain. Sanding across the grain will leave scratches in the wood. Which will really spoil the look and the finish of the floor.

Sand the wood with the grain until you have removed all of the existing finish leaving clean non stained wood. If there are gauges in the floor, you may have to hand sand these to avoid removing too much of the actual wood. There are techniques for repair gauges, however we will not be covering this technique in this post.

Once the floor is sanded to your satisfaction, it is clean up time. Basically you need to sweep up all of the dust and then use a tack cloth to get the remaining particles on the floor as well as the walls, windows and ceilings. Your sander may have had an exhaust blower to blow the dust out the window or into a bag to capture it. This is a great feature, however there will still be fine particles of dust everywhere so get out the tack cloth and get every single particle of dust. This will avoid dust leaving marks on the floor when you apply the stain or the finish.

Staining your Hardwood Floor and Finishing Your Floor

If you are applying a stain to the floor to change the natural color of the wood, now is the time to do this. Make sure you have lots of ventilation so that you can breathe and do not harm your lungs. Start in a corner and work your way to the door to avoid locking yourself into a corner with no escape.

Allow the stain to dry according to the manufacturer’s directions. Then apply the finish coat that will protect the floor for many years. This is usually a verathane of some kind. Which will have a high luster to it and bring out the grain in your floor.

Many consumers will hire a company to refinish their floors. The major advantage is that the work is completed quickly and efficiently. In a matter of days your floor is as good as new and you can move your furniture into the room. When you do the work yourself, you definitely save a lot of money, however with work and family commitments, refinishing your hardwood floor can take several weeks.

This is a really basic decision of cost vs. time vs. work and each consumer will need to make their own decision regarding just how much work they want to do vs. putting up with disruption in your home for several weeks.


Hardwood Floor Restoration

The really neat thing about hardwood floors is that you can restore them. The really bad thing is that it takes some work to restore them to their original beauty. Hardwood floors are usually finished with a clear verethane or urethane coating. This finish brings out the grain in the wood and protects it as well. Foot traffic brings in grit from outside brought on shoes. It is ground into the floor, furniture scratches, marks from children’s toys. Also general use all contribute to the gradual decline in the beauty of your floor.  Fortunately, as long as there is still sufficient wood left, the floor can easily be refinished. The original luster can be restored.

Hardwood Floor Restoration Using a Belt Sander

If you have sufficient wood thickness left a belt sander is probably the best tool to use to remove any remaining coating on the wood. Minor gouges and scratches will also be removed since the belt sander will remove some of the wood as well. Each time you sand the floor the thickness of the wood decreases. Once the nails are exposed, no more wood can be removed. Removal of minor scratches can be handled this way quite easily by using a belt sander. Once you are finished sanding, the floor and room needs to be thoroughly vacuumed. Then a tack cloth needs to be used to remove all traces of dust prior to apply a new sealing coat.

Hardwood Floor Restoration When You Cannot Use a belt Sander

Hardwood floor restoration sometimes must be done using a lot of elbow grease. In situations where the wood is too thin, uneven or nails are beginning to show through, consumers will be faced with the job of sanding the floor by hand. It is hard work and expensive if you hire someone to do the work for you. This approach is often less expensive compared to ripping out the existing floor and installing a new floor.

Sanding by hand is just plain hard work and even a small room is going to take several days to complete. Your arms and hands are going to get very tired and sore, so it is best to spread the work out over a few days. A couple of hours every day will make short work of it without taxing your body too much. Having personally sanded a floor in this manner took me three days to sand, another day to clean and then two days to apply two finishing coats with a light sanding in between.

Sanding by hand must be always done with the grain. Never go across the grain since this will leave tiny scratch marks which will show up when you apply verethane to the wood to bring out the grain. Sanding by hand also removes a minimal amount of wood which is a good thing if your floor is getting a bit thin.

Cleaning

Cleaning is done the same way. Make sure you vacuum well and then clean every square inch with a tack cloth to clear any dust away and avoid it marking the floor when you apply the finish.

Many hardwood floors take a lot of abuse, but they will stand up to this abuse for years and years. Hardwood floors will last longer than a carpet or linoleum. A floor that was installed in the 1920’s was refinished and looks as good as new. Hardwood planks were much thicker then than they are today and this floor has been restored multiple times. There are some small gaps between the planks and a few deeper gouges which can be still seen.

They add character to the floor that goes along with the building. Some boards are cracked or broken and need to be repaired. These can be carefully be lifted out and a new piece inserted. Most people will stain the new wood prior to actually installing the new piece into the floor. Care needs to be taken to make sure there is a good match in terms of color, grain and texture of the new piece with the existing floor. The new section also needs to be at exactly the same height as the existing floor to avoid scuffing marks and causing people to trip over it as they walk over it.

Hardwood floor restoration can be hard work, however the result is a beautiful floor you can appreciate for many years.


Hardwood Floor Refinishing

If you are thinking about hardwood floor refinishing a floor that is in as bad a shape as this one, the first step is to really assess whether it is less expensive to replace the floor vs. refinishing the floor.

Believe it or not this is an option. Ripping up the old floor, installing a new secure sub floor to take away all creaking noises and installing a new finished floor can be a valid alternative.

Get Quotes

Ask for an estimate to sand the floor, repair any broken boards and then add a finish to the floor to bring out the grain and to also protect the newly sanded floor. One of the things to consider is whether there is sufficient wood left to sand. Floors that are thin to start with or have been sanded many times sometimes will become very thin as some wood is removed each time the floor is sanded. A floor like the one above may also have a lot of severely damaged boards.

If too many of the boards have been damaged, it may cost too much to repair them or in some cases they may not be able to be repaired. Asking for an estimate and discussing what needs to be done will help you make a decision. It is amazing how a little work and polish can turn a bad looking floor into something of beauty.

The second quote you need to properly compare solutions is to ask for a quote to remove the old floor , install the sub floor and then install a new hardwood floor. Once you have these two prices you will be able to make an informed decision regarding which scenario you want to consider.

There are additional options to consider as long as you are satisfied with a less than perfect floor.

Sand less Floor Refinishing

As long as you are not concerned about removing scratches, stains and marks this solution might work for you.  First of all the floor is deep cleaned to remove all dirt using a specialized floor cleaner.  Once it is dry, the floor is buffed with a floor etch and then a water based catalysed finish is applied to your floor to give it the finish and protect the floor from future scratches and marks. The big advantage is that you get to keep the old floor complete with existing scratches and dents, however it comes with a brand new finish and it only takes one day to completed. you can start using the floor with in 4 hours or the next day if you want to be careful.

Drum Sanding of Your Hardwood Floor & Refinishing with Oil Based Urethane

The floor is sanded with a drum sander and then three coats of oil based urethane are applied. It can take 3 days to complete the job. The urethane must be allowed to dry and the floor will look brand new once the urethane has dried. It is a little more expensive, but you have a new looking floor. There is usually a very strong odor to the oil and some customers might be affected by the smell.  You should allow 2 to 4 days before placing furniture on the floor. There also must be sufficient wood left on the floor to sand in the first place as mentioned above.

Drum Sanding of Your Hardwood Floor & Refinishing with Water Based Urethane

Same as above, however the finish is water based. Less smell and much faster turnaround. It is more expensive usually, however the floor can be used the next day. The odor is significantly reduced as well which will be attractive to many consumers. This approach has great floor protection characteristics. It will not yellow over time in the way that oil based urethane’s might.

Lot’s of decisions to make regarding your hardwood floor. First step give it a good cleaning yourself and then assess if there is enough wood left to endure a complete sanding. If not you try the first option or just replace the floor. Depends on budget and prices quoted locally. Either way having a hardwood floor is much better than having a carpet any time. Less dust and much less upkeep. If you take good care of your floors they will last for many years.


Hardwood Floor Refinishers

Tackling Simple Wood Floor ProblemsThe floor in this picture really is in need of some work. Hardwood floor refinishers can bring an old floor like this one back to almost new condition if it is done properly. With all of the scuff marks and dust, it actually looks worse than it is. With a sanding and new stain it will look fantastic!

This floor needs a lot of work and you may want to hire a professional hardwood floor refinisher to do the work for you. However it is a good idea to understand what should be done for a floor like this. So that you can properly evaluate the proposal from any company that comes to do this work for you. There are many companies that offer hardwood floor refinishing services. The only way that you will be able to evaluate them properly is to know and understand the process. Also have some idea of how long the work will take.

First Steps for Hardwood Floor Refinishers

Before you call anyone, we would suggest that you vacuum the floor completely to remove all loose material. Next we would suggest that you clean the floor with a damp mop, not a wet mop. The objective is to remove any dirt etc. that may be on the floor. You want to be able to see all of the imperfections in the floor, any damage to the floor. You really be able to assess what is needed to bring this floor back to a like new condition. Some people might say that this is a waste of time. The refinishing people are just going to remove it anyway. While this is true, you will be able to see just how bad your floor is and make your own assessment.

The final step at this stage is an important one. When the floor is refinished, the top layer of finish and wood is going to be removed to expose clean wood that has not been penetrated by stain. If a floor is quite old, it may have been sanded several times before. It may not have much wood left for you to sand. You need to evaluate whether this is a hardwood floor that can be sanded or not. The easiest way is to remove the hot air register in the floor. Determine the thickness of the wood that is left. If you do not have a register in the floor, you are going to have to determine some other method of assessing the thickness.

Refinishing the Hardwood Floor

Whether you do the work yourself or have someone do it for you there are a number of things to keep in mind. First of all we suggest you talk to professionals to help you understand exactly how to proceed. This post is just too short to cover all of the details. To start with when you are sanding, you should never sand across the grain of the wood. never use orbital sanders, since they will leave scratch marks that run across the grain of the wood. Always use an inline sander to do your sanding. Keep the sander moving continuously to avoid over sanding in one spot. Only sand off what you need to expose the original wood.

With old floors there may be scratches and nicks in the floor. Unfortunately you are going to have to put these down to adding character to your floor. Minor nicks can be sanded out, while deeper scratches and nicks will have to be left the way they are, other wise you will sand too much of the wood off. You may need to use a small pic to remove stain or wax from the grove or nick in the floor. There will also be some hand sanding on the floor in corners and other hard to get at areas.

Once  the sanding is completed, a thorough cleaning is needed to remove all dust from the room and the floor. Again a damp mop is a good idea to pick up any remaining dust. Vacuum as well to get the dust out of the cracks between the strips of hardwood flooring.

Apply Finish

Next you can apply the finish to the floor. There are many kinds of finish including stains to stain the wood to a particular color that you may prefer. As well as protecting coats that can be placed on the floor. The best approach is to go to a paint store and speak to someone who is knowledgeable in the subject regarding hard wood floor stains etc. They will be able to recommend the best stain and covering for your floor based on the condition as well as the look that you are trying to create. Most people will use a clear var-ethane type of product to protect the floor from normal wear and tear of people walking on it.

Ask lots of questions and make sure that you are comfortable with the professionals that are doing the job. Also that they know what they are talking about and that these hardwood floor refinishers will not leave it worse that it was before they started.


Finishing Hardwood Floors

No one really wants to contemplate finishing hardwood floors, however there comes a time when your floor will have lost that shiny look and begins to exhibit the wear and tear from many scratches and other damage from long use. While an old hardwood floor that has lost it’s luster may seem charming to some, most consumers like to have a floor that is shiny and new looking. It may be time to refinish your floor.

A floor that has just been refinished also adds to the resale value of your home. If you are planning on selling your home in the near future, you might want to get an opinion from your real estate agent regarding the state of your floor and what your plans should be regarding finishing the hardwood floor. They will give you advice on whether it is worth making the investment in time and money to refinish the floor or leave it for the next owners to decide.

Finishing Hardwood Floors

Many people avoid doing their floors simply because they shudder at the vision of all the dust that is generated and the cleanup that is required afterword.  The wood dust is very fine and without taking any precautions, there is going to be dust in every room, every nook and cranny of your home. It will go everywhere and if you happen to a forced air furnace or air conditioning and it is running, the dust will absolutely coat everything. The clean up job is immense unless you move everything out of your home.

Fortunately there are steps you can take to reduce the dust and control were it goes inside your home. It is very important that you follow these steps if you are doing your own hardwood floor. Or even if you are having professionals do it for you. Always discuss with the professionals exactly what steps they will take to prevent dust from entering the rest of your home before you sign the contract.

In this post we are assuming that you are sanding the hardwood floor when it comes to finishing your hardwood floors. If your floor has been sanded previously, take a look at the thickness of your floor to make sure that there is sufficient wood left for another sanding. Each sanding removes wood from the floor and leaves it a little bit thinner every time. There are other approaches, however they are not being discussed in this post.

Procedures to Take to Reduce Dust Distribution Inside Your Home

The following procedures should be followed. Regardless of whether you are doing the work or hiring a professional to do the work:

  • Remove all furniture and accessories from the room
  • Seal off every doorway and vents that enter the room to be sanded
  • Use a high powered vacuum system attached to the sander
  • Locate the vacuum outside of your home
  • Turn off the central air system in your home
  • Make sure that the fan is shut off
  • Wipe down all walls and floor once sanding is finished
  • Always sand with the grain , never across the grain of the wood
  • Never use an orbital sander on hardwood floors
  • Hand sand all areas you cannot reach with a powered machine

Applying the Finish

Once all of the sanding and cleaning of the floors is completed you are now ready to apply the finish to the floor. Make sure you use a tack cloth to get all of the finer particles off the floor. Do this before you apply your finish to avoid thee particles marring your finish.  Follow the manufacturers instructions to obtain the look that you desire. Your floor will look fresh and new and add tremendous pleasure and value to your home.

If you decide to hire professionals to do this work for you, always interview them. Ask them to explain in detail exactly how they will complete the job for you. Pay particular attention to the dust  exhaust. Also the cleaning part of the job as well as the final finish of the floor. Otherwise you may end up being disappointed with the work. As well as the cleanup that you may have to do after everything is done.


Dustless Hardwood Floor Refinishing

Refinish Hardwood FloorThere are several different methods of dustless  Hardwood floor refinishing available on the market.  There are pros and con’s to each and of course not all vendors will offer both methods.  Regardless of which method you choose, there were always be some dust to deal with and you will want to take the appropriate precautions to both avoid this dust as well as prevent the dust from finding it’s way throughout your home into areas that are not being refinished. This is particularly bother some to people who like their place really clean and who do not want to deal with allergic reactions to the dust.

Traditional hardwood floor refinishing involves sanding the entire floor with a sanding machine which creates a lot of dust which can find it’s way into every nook and cranny of your home. This sanding of the floor and all of the dust is not attractive to many consumers who must clean afterwords and who also may have allergies to wood dust.

There are two methods of dustless  hardwood floor refinishing available on the market:

  • High powered vacuum systems
  • Chemical dustless  hardwood floor refinishing

High powered vacuum systems

Professionals will use a high powered vacuum systems to capture all of the dust from each sander and blow it outside into a machine with a bag to capture all of the dust. There always be a little dust left in the home, however the amount is usually less than 10% and the cleanup in the area that is being refinished is much less than traditional methods.

If you have a number of rooms to complete, venders will have a large hose attached to the vacuum machine with a splitter that allows more than one sander to operate at the same time. They should also place plastic covering over all doors and windows, including vents to prevent dust going to other areas of the home.

All refinishing of hardwood floors generate some dust that remains in the home. Professionals will wipe down all walls  once the sanding activity is completed.

Chemical dustless  Hardwood floor refinishing

The process of chemical dustless  hardwood floor refinishing involves a technician scuffing the floor lightly. Then adding a chemical to etch the floor.  Cleaning of the floor and repair of minor damage should be completed before applying the new finishing coat. This can be accomplished much quicker than doing a complete sanding of the floor. In addition it creates much less dust than traditional sanding.

Note that if you have a lot of damage to your floors or many coats of stain or protective covering, you may not be able to use this method. Check with your hardwood floor professional prior to making any decisions regarding this approach.

Always experiment with the chemical etching on a small section of the floor to ensure that you will be satisfied with the result. Choose an area that is out of the way and will not be noticed if it does not turn out the way you anticipated.

Advantages of Dustless Hardwood Floor Refinishing

There are many advantages associated with either system. We have listed a few of them as follows:

  • Chemical refinishing can be accomplished more quickly
  • Chemical refinishing is less expensive than traditional methods
  • Both approaches generate much less dust
  • Vacuum systems take 90% of the dust outside
  • People with allergies will be impacted less with these approaches
  • Cleaning afterwords is reduced significantly

Disadvantages of Dustless Hardwood Floor Refinishing

There are many disadvantages associated with both system. We have listed a few of them as follows:

  • Not all floors can use the chemical dustless refinishing method
  • Floors with major damage may require traditional sanding methods
  • Some people may be bothered by the chemical used to etch the floors
  • All refinishing reduces the overall life of your floors
  • All refinishing approaches will generate some dust
  • Consumers will need to tolerate the sound of the vacuum and sanders while this work is being completed

While no really wants to have to refinish their hardwood floors, there will come a time when refinishing will be required. You can delay this requirement by protecting your floor with the following easily followed steps:

  • Always remove your shoes at the entrance to your home
  • Vacuum your floors at least once per week, more often in high traffic areas
  • Damp mop your floors once a month

The methods and steps are designed to minimize the amount of grit that is tracked into the home. This avoids the grit being ground into the hardwood floors by people walking on it. This grit will mar the floor or perhaps even scratch it. Grit will also leave the floor dirty as well which is why you need to damp mop often. You can get away with damp mopping as often as once per month if you do not track a lot of dirt and grit  into your home.


Hardwood Floor Refinishing Minneapolis

Hardwood Floor ContractorsHardwood Floor Refinishing Minneapolis – Once your hardwood floor has been in service for 15 to 20 years, it may be time to refinish the floor to return it to it’s pristine look when it was originally installed. This time frame will vary a great deal based on how well you take care of your existing floor and how much the sun shining on your floors has caused the finish to fade. This is when you need Hardwood Floor Refinishing Minneapolis contractors to provide quotes.

Consumers can avoid the costly expense and work of refinishing a hardwood floor if they take of the floor and avoid walking on the floor with their outdoor shoes. This will extend the life of your floor for many years and avoid the costly expense of refinishing your floors.

Avoiding Hardwood Floor Refinishing Minneapolis Contractors

The best way to prolong the finish on your floor is to follow these steps or rules:

  • Do not wear your outdoor shoes inside the house
  • Remove all outdoor shoes as soon as you enter the home
  • Vacuum at least once a week or more often especially around the entrance to catch any grit that may find its way onto the floor
  • Damp mop your floor on a regular basis as well. Timing will depend on the shine of your floor. Starting to look dull, vacuum and then damp mop
  • Avoid using anything abrasive on the floor to clean it
  • Avoid allowing toys or other sharp objects on the floor
  • Wipe up spills immediately
  • Use furniture pads to protect your floor from grooves from the furniture legs

Many people are worried about removing too much wood when they sand the floors. Progressive sanding can leave little or no wood and cause a wholesale replacement of the floor. Sometimes depending on the existing finish a light sanding will suffice, to remove all surface scratches and then a new coat of var-ethane or urethane can be placed  on the wood.

Wood floors with deep scratches and marks will have to be sanded down to the bare wood to remove the scratch and to make the floor look uniform. This can remove more wood from the surface than desired, so care should be taken when using a power sander to remove too much wood.

Remove all of the Dust

Once all of the existing finish has been removed and the scratches are gone, give the floor a light sanding with a fine sand paper and thorough clean with a vacuum before using tack cloth to remove all remaining small particles of dust. you will want a perfectly clean room with no remaining dust to gain that perfectly shiny floor. Your Hardwood Floor Refinishing Minneapolis should follow this approach to avoid getting a lot of dust into your home.

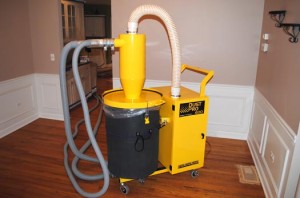
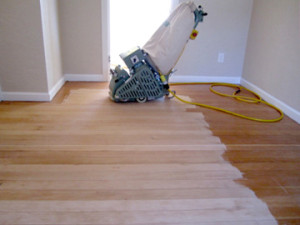
The picture above shows a sander that is labeled as a dustless floor sanding machine.  These machines work well and will remove a great deal of the dust from your home. Most important from the room that you are doing your sanding in. It is important to remove all dust to ensure that you have a very clean room prior to applying your final finish to your floor.

Still Some Dust

Even when using a sanding machine, you are still going to have to do some hand sanding in the corners. Also areas that you just cannot get to with a larger machine. You will need to make sure that you do not sand across the grain. Always and with the grain and never use an orbital sander. it will eave small circles. Which will show up on your floor when you apply to finish to your floor.

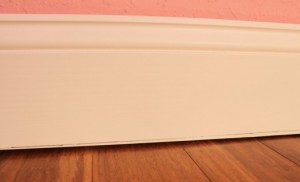
We also recommend removing the baseboard so that you can get in close to the edge of the walls and avoid  having to do more sanding by hand. In most cases you will also have to sand and paint the baseboards since they are older as well. In some cases it is just easier to replace the baseboards with brand new base boards. They will need to be primed and then painted. All nail holes will also need to be filled in and sanded.


Hardwood Floor Refinishing Denver

Hardwood Floor RefinishingHardwood floors have been installed in homes all over the world for thousands of years. The finish on hardwood floors has changed and improved a great deal in the last 20 years. Making them even more popular and increasing the number of homes that have installed hardwood floors.

For the past 30 years there was a trend towards carpeted flooring. However now increasingly consumers are opting for hardwood flooring in new homes. As well as part of renovation projects that are being undertaken. They prefer hardwood to carpet because of the nice clean finished look that hardwood provides. They also last for many years if properly taken care of.

Hardwood Floor Refinishing

There are many types of hardwoods that are used. There are many finishes as well, however they can be grouped into three main categories:

  • Natural shellacs, lacquers and varnishes
  • Oiled floors
  • Polyurethane floors

More Detail About Floor Finishes

We will describe each of these floor finishes and then how to refinish each flooring type. Whether you are in Denver or some other city, hardwood floor refinishing projects can make your home much more beautiful. They can also increase the overall look of an otherwise tired looking hardwood floor.

Natural shellacs, lacquers and varnishes – they were used in the past along with waxes and provide a protective coating on the flooring. In order to refinish a floor with this kind of finish on it, all of the existing finish must be removed and sanded smooth. Only then can you add a new finish onto the floor to protect.

Oiled floors – this is the most common type of flooring finishing agent. It is used throughout the world and also should not be confused with petroleum oils. Most are vegetable oils and are naturally drying on the flooring

Polyurethane floors

This finishing product became available after the 1940’s. It is sold under various brand names as a urethane or a varnish. Again with an existing floor, you must sand off all of the current finish down to the bare wood and then re-coat the wood with the finish agent that you plan to use.

Most new homes that have installed hardwood floors will not need to refinish their floors for many years unless they are particularly hard on their floors. Maintaining them and keeping them clean will help to maintain the shine of the floors for a very long time. For example, never wear your shoes inside the home. shoes track in dirt and grit which over time will scratch your floors and dull the finish.

Vacuum often and damp mop to maintain your floors. Do not use soaps especially oil based soaps. Talk to your flooring company to find out the recommended cleaning products for your floor.

One of the huge advantages of a wood floor is that it does not accumulate dust and hidden grit or odors. It sits right on top of the floor and that is why you need to vacuum often to avoid tarnishing the finish.

Refinishing Your Hardwood Floor

Sand with the grain and never across the grain. Use and inline sander that does not orbit the sandpaper, other wise you will have tiny concentric circles throughout your floor. Sand all of the existing finish off the floor using progressively finer levels of sand paper until you a nice smooth finish. Once the floor is fully sanded, you can then apply the finish of choice to your floor. You will have a brand new floor that looks like it was just installed.

Most hardwood floors are of a standard thickness with lots of room for sanding off the old finish. In some situations such as an older floor which has been sanded many times, there will be less and less wood available for sanding before you wear completely through the hardwood floor. be careful to not take too much of the unfinished wood off the floor to avoid this problem. Otherwise you may have to replace the entire floor.

Refinishing a hardwood floor is a lot of work, but very rewarding as well. Take your time if you are doing it yourself and avoid those frustrating mistakes we all make when we are in a hurry. Otherwise hire a professional in the Denver area for hardwood floor refinishing work.


Removing Scratches and Dents in Hardwood Floors

Removing Scratches and Dents in Hardwood FloorsWe have not tried the process of removing scratches and dents from hardwood floors that we are going to describe in this post. If one of our readers has tried this we would really like to hear from you. We have a couple of scratches. Also some marks we want to get rid of but are hesitant to try this approach. We know that you should always experiment first. In an out of the way place on your floor in case you screw up so that it will not be seen. We just do not have that situation and are afraid to try it in a main floor area. Anyone with comments?

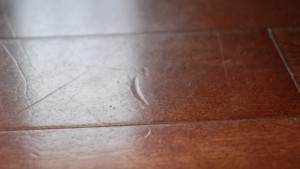
What we have is a scratch from moving a piece of furniture across the floor. It is about 3 inches long and maybe a 16th of an inch deep. We have a rug covering it now, but really would like to remove the dent in the floor so that it does not show. The rug is not in the ideal place for us. It happened before we even realized that the bottom of the piece of furniture had a leg that could do that. My husband was so mad, he could spit nails. The floor is only a year old and we would like to be able to remove this scratch or at lease minimize it so that it is not as noticeable.

The Recommended Process

Removing a scratch or dent sounds pretty simple. The steps are as follows:

  • Wet the scratch or dent with a little bit of water
  • Apply a wet cloth or paper towel over the dent, and then
  • Move the iron in a circular motion across the towel for 3-5 minutes
  • Make sure there is a lot of stem being generated and do not allow the iron to stay in one place for long to avoid over heating the floor.

We were told that this does not work on all hardwood floors especially those with finishes. You definitely want to try this in an area that is out of the way before trying it on the floor in a high visibility area.  Older hardwood floors were the finish has worn off are probably the best to try this process on.

Applying heat over a damp cloth may in fact lift the finish off or at least remove the shiny look that your floor may have. Sanding with a very fine sandpaper or steel wool may buff it back to the shiny look, but not always. Try it first somewhere out of the way. I know we keep saying this, but we cannot emphasize it enough.

Removing Scratches and Dents in Hardwood Floors

Dents that have been around for a while may also have dirt lodged in the crease or depression. Even with the treatment above you may find that light sanding is going to be needed in order to remove this dirt. Before you start sanding, ensure that you have a plan for dealing with the floor area to be sanded after you remove some or all of the finish.  Sometimes you can match the existing finish and do a patch job. Which will be almost invisible. However again experimentation is encouraged before trying it on the main floor.

You definitely do not want to end up with a floor that has several colors or tones to it which stand out even more than the dent or scratch did.  If it does not work in your experiment you definitely do not want to try it in the main spot.

If you have tried this or have comments on removing dents or scratches from hardwood floors, leave a comment. Both of us will benefit and we will help our readers at the same time.


When to Refinish a Hardwood Floor

Refinish a Hardwood FloorAnyone planning to install a hardwood floor should also understand what is needed refinish a hardwood floor and even whether you can refinish the floor at some future point. This applies to consumers who are planning to install the hardwood floor themselves. Also those consumers who will hire a contractor to do the installation. Some hardwood floors are very thin, almost laminate style. These floors generally cannot withstand re-sanding and refinishing. There is just not enough wood to work with.

A traditional hardwood floor is more than thick enough for re-sanding and refinishing several times. Before you buy, confirm that the wood you are using can be refinished at least once.

Refinish a Hardwood Floor

Most people will not need to refinish floors for many years. It really depends on the amount of traffic and the type of traffic on your floor. People who wear their shoes inside are going to have to refinish their floor more often compared to socks and slippers. Small pieces of grit are tracked in on your shoes. The grit works almost like sandpaper to wear off the finish from your wood.

Many flooring companies provide classes and experts to train those consumers who plan to install their own floors. Also if you plan to complete finishing of a hardwood floor. Most hardwood floors these days are pre-finished. They only need to be installed without any sanding or major cleanup.

Tips to Decide When to Redo Your Floor

After your floor has been installed for many years, there are tell tale signs to look for that will indicate whether your floor needs to be refinished. Here are a few tips  to help you decide if your hardwood floor needs to be refinished.

  • In high traffic areas, the finish tends to wear off . Leaving a dull looking floor compared to other areas of the floor.
  • If you take a teaspoon of water and drop it on the floor, the water will form beads if the floor is still properly sealed. When you have this situation then at most all you need to do is cleaning and the odd stain removal.
  • If the water soaks right in, as well as leaves a dark spot, then you definitely need to refinish the hardwood floor.
  • Don’t wait too long since the longer you wait, the more the damage will be to the hardwood floor.

Once you decide to refinish your hardwood floor, it is important to sand the floor to remove any damage. Also any existing stain and protective coatings so that you will end up with a uniform looking floor.
(continue reading…)


Hardwood Floor Sanders

Refinish Hardwood FloorsAn important part of resurfacing or refinishing an existing  hardwood floor is sanding. A professional sanded floor can add immense value to an old floor. Hardwood Floor Sanders can remove gouges and scratches, bring out the true beauty of your floors, and also allows you to change the stain if you wish to enhance the floor. This is work that can be completed by the average person.

Provided that you take the time to learn the proper way to sand a floor and also use the right equipment. If you make a mistake and ruin your floor it can be very expensive and depending how bad the mistake is, you might even have to replace the flooring with new flooring. Take your time, learn what you need to know and talk to experts. Experiment on a small area first to make sure that you have the proper procedure nailed down. Select an area that is out of the way and perhaps hidden by furniture.

 Sanding is needed

Sanding is necessary to remove water marks and other damage that may have occurred on the floor. When you have  large surfaces to cover, a hardwood floor sander is the only way to refinish a hard wood  floor. We have gathered some information regarding hardwood floor sanders along with some tips on their operation for those interested in taking on the task. Sanding the floors yourself can also save the consumer a lot of money, however care is need to make sure it is done correctly or you could actually ruin the floor completely.

Hardwood floor sanders come in many shapes and forms and each will perform their task in a different way. There are drum sanders, belt sanders, orbital sanders and disc sanders. Along with this there are still edge sanders to deal with not to mention the sand paper itself.

These machines are helpful tools when used properly, however if placed in the hands on someone lacking experience they can cause a lot of damage with expensive repairs required.

Hardwood Floor Sanders

Drum Sander

The most common of all the hardwood floor sanders is the drum sander. These sanders are meant to get right down to the bare wood and they do a good job. One problem with the power of drum sanders is that if you are not careful you can sand a groove in your floor. This means you should have some previous experience with the machine. Experiment first before you try it out on your expensive hardwood floor. It is a good idea to take a scrap piece of wood and try it before moving to the real floor.

Remember to use these sanders in the direction of the wood grain. This is also very important. Sanding across the wood grain will leave scratches that the stain and verathane will enhance leaving you with a non professional looking floor.

Belt Sanders

Belt Sanders are the next most seen of the hardwood floor sanders and are somewhat easier to use. These sanders do however require control and strength in order to do the job well.

Other Hardwood Floor Sanders

Orbital Sanders and disc sanders are more suitable for small jobs or for sanding specific areas. These however are known for their tendency to leave circular marks in the floor.

With hardwood floor sanders, everything comes down to what you feel comfortable with and what you are capable of handling. Gaining experience before you use the sanders on your floors is highly recommended. A good sanding job will revive your floors and add value to your home. Some of the larger chain stores will offer training courses from time to time on the use of equipment. These are definitely worth the time and you can then approach the job with more confidence.


  • Copyright © 1996-2010 Managing Home Maintenance Costs. All rights reserved.
    iDream theme by Templates Next | Powered by WordPress