Archive for August 21st, 2011

Should You Leave Solar Blankets on Pool

solar blanket for your poolWe had a question about whether you should leave  solar blankets on a pool all of the time or take it off every day. Whether we are using the pool  or not. The short answer is, leave solar blankets on as much as you can but you also should let your pool breathe a bit every day. Remove the solar blanket for an hour once a day.

We have had a pool for the past 23 years and have used a solar blanket for every one of those years to keep our pool nice and warm for swimming. It has worked out great for us and it is well worth the cost of a solar blanket compared to heating with a gas heater. But back to our question of whether you should leave a solar blanket on the pool or not all day long.

Based on our experience the answer is yes, however there are some issues you need to be aware of if you are going to do this.  The practical side of leaving your solar blanket on the pool is whether you take the time to monitor the temperature and also the level of chlorine in your pool. If you let the water get too warm and the chlorine level too low, you risk the growth of green algae in your pool. In fact our pool turned totally green one year because I forgot to check the chlorine level. It took us 2 weeks to get the pool clear again.

Solar Blankets Schedule

This has been one of the best summers for a pool and so far we have had no problems at all. This is our schedule for the pool which has worked well for us:

  • Pump is turned on to circulate the water from 6:30am to 9:30am
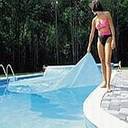
  • Solar blanket is removed around lunch time
  • Chlorine level is checked around 6pm
  • Pump is turned on to circulate the water from 6pm until around 10pm
  • Chlorine and algaecide are added as needed
  • Chlorine shock treatment is completed once every 3 to 5 days depending on the temperature of the water.
  • Solar blanket is place back on after we are finished swimming in the evening

Daily Monitoring

The message here is daily monitoring of the chlorine level in the water or at least every 2nd day. It is very important to not let the water get cloudy ever. Once it does it is only a matter of hours before it goes green on you. Check the sides of the pool daily. If you begin to see green algae forming on the sides of the pool or the water begins to look a little bit cloudy , it is time to take action.

With the solar blanket on the pool so much, the water temperature rises quickly so daily monitoring is required. Once the blanket is removed and people are swimming, the water is being circulated more and mixed as well. So there is no need to have the poop pump on all day long for private pools. However if you are the type to forget about some of these steps then it is best to use an automatic chlorinater. Leave the pool pump on all of the time.

Hot Water

There is an added benefit of leaving the solar blanket on with the pool pump off. The top foot of water gets incredibly warm. This makes it very nice to enter the pool and swim in the top foot of water. This warm temperature is really great when the air temperature begins to cool as you get closer to the fall. Day time temperatures are lower. Of course after a few minutes the water mixes and the overall pool assumes the average temperature of the water.

This has been our experience of leaving the solar  blanket on the pool for long periods of time. With Solar Blankets you can save energy and also enjoy a warm pool too. It really does depend on the sun. If you only have cloudy rainy days there is not much to be gained by a solar blanket. Or even heating the pool with a heater. Comments are welcome.

For more articles on solar pool heating, click here.

Save


Installing a Garage Door Opener

Garage Door OpenerI just finished installing a new garage door opener. Although it took a few hours and a second pair of hands, the actual installation was pretty straight forward. My old garage door opener had lasted for almost 22 years. Although still working it was beginning to be a little temperamental. I knew it was on its last legs so to speak. I asked for a new one for a Christmas gift and finally got around to installing the new garage door opener in July. This post is to talk about my experience and how I saved the installation fee.

Removing the Old Garage Door Opener

It is always easy to remove things and take them apart, in most cases. It certainly was in this case as well. However I did do a little bit of planning so that avoided removing pieces of the old installation that I was going to need with the new opener. This made the job a lot easier as well. Basically on the garage door itself there is a bracket that is used to attached the opener to the door. This was saved and reused. The motor portion hung from the ceiling with a series of metal braces. Although not perfectly adapted for the new opener, I was able to reuse all of the mounting brackets and hardware without having to remove it from the ceiling.

Follow the Instructions

This is really the best advice that we can give at this point. In my case they were step by step and easy to follow. We are not going to quote them here since every door opener will be different. One thing we can say is that you should read ahead and understand the big picture before starting. Have all of the tools you need to have close by and arrange for someone to give you a hand at a critical time when it comes to physically hanging the motor and track.

There is a lot of preparatory work you can do ahead of time. The biggest time consumer for me was running all of the new wiring. I removed the old wiring and installed the controls, but then you have to run the new wire in as well. This is recommended since you want to avoid any potential problems with old wires that might be corroded or damaged in some manner.

My old garage door opener did not have sensor to detect an object that was blocking the door from closing. Sensors must be installed a foot from the ground and wires run back to the motor. These sensors will stop the door from closing if there is any kind of object blocking the opening. These sensors also turn the lights on if you walk between them, which is a really nice security feature at night when your garage is dark and you want to avoid obstacles that could have been left behind in the way.

Ask for Help to Mount the Motor and Track

Once I was ready, I asked one of my neighbors for a hand to hold the ladder and lift the track up to me until I could permanently attach it to the mounting brackets. This took about 5 minutes of work and about 25 minutes of chatting about the news and people on the street. Although interesting, this can be a time waster, especially if you are in a hurry to get the job done.

That’s about it. As we mentioned earlier read the instructions from cover to cover before starting, plan your work and reuse as much of the mounting brackets as you can to make the job easier if you are replacing an old garage door opener. This is definitely a do it yourself kind of job for the average person with the right tools.  Take your time and be safe – unplug the old opener before you start working and get someone to hold your ladder when you are on it.

Comments about your experience of installing a garage door opener are welcome.

Save


Residential Property Management Ottawa

Residential Property Management OttawaThere are many residential property management companies in the city of  Ottawa. How do you know which one to utilize and contract with to manage the rental of your home or apartment. Or your investment property? Perhaps you just need someone to look after your home while you are away on vacation to satisfy your insurance company!

Ottawa property management companies offer a variety of services. For example some are city-wide while others cover only specific areas of the city. Hence this is designed to minimize travel costs and the subsequent charges to their customers. In addition there are very large property management companies. There are also small mom and pop companies in the city of Ottawa.

Residential Property Management Ottawa Services

For example some of the basic services that you need to consider are:

Administration:

  • rent collection in trust
  • payment of invoices, property taxes, utilities, insurance
  • in addition monthly reports, annual reports
  • maintenance of property records
  • in addition cash flow management
  • property inspections
  • receive and respond to tenet inquiries 24/7
  • hence representation on all rent review matters

Leasing:

  • advertising of rental unit
  • receive leasing inquires 24/7
  • schedule showing of property
  • in addition complete rental application
  • tenant screening process
  • execute lease
  • subsequently collect deposits and post-dated checks

Residential Property Management Ottawa Companies

Here is a brief list of some of the companies in the city of Ottawa that provide residential property management services

  • Sleepwell Management
  • Marklyn Property Management
  • Taggart Realty Management
  • CLV Group
  • District Realty
  • Gow Property Management
  • Megacorp Property Management Inc
  • Woodbridge Management
  • Apollo Property Management
  • Metcalfe Realty Company Limited
  • Just Imagine Realty Inc
  • Affordable Property Managément
  • Merkburn Holdings Ltd
  • Immogest Property Management Inc
  • Attaché National Capital Management
  • Rest Easy Property Management
  • Elk Property Management
  • Deerpark Management Limited
  • Executive Home Mgmt
  • A Premiere Property Management Associates
  • Axia Property Management
  • Capital Concierge
  • Sentinel Management
  • Beauregard Property Management corp
  • Reid Property Management Ltd

While we cannot vouch for any of these companies we urge you to review our post about residential property management. Understand some of the things you should take into account when you are considering hiring a property management company. This list has a lot of common sense items on it. You may find helpful when you are interviewing some of these companies.

About Ottawa

Ottawa has approximately a million people living in the area and is spread out along the Ottawa river. Hiring a local company that is based in your area may mean that you can get a more competitive price. However be careful that you do not sacrifice services to yourself or your tenant to get a lower price. For example it could end up costing you a lot more money in lost rent or damages that you must repair. Especially if your tenant causes a lot of damage. Then skips out with out your property managers knowledge.

If you are leaving on vacation for a few weeks, check with your insurance company. For example ask what the requirements are for someone checking on your home. Hence failure to have some one check on your home could mean that your home insurance is invalid. As a result claims may be denied.

If you are a property manage and do not see your name on the list, leave us a comment. Subsequently we will be happy to add it. For more information on Residential property management, click here.

Save


Updating Your Mobile Contract

Updating your mobile contract takes time and I just spent over an hour with my mobile provider talking to them about what plan I should subscribe to since my contract is up for renewal. I had vowed thatUpdating Your Mobile Contract I would never sign another contract for one year or longer ever again. The rates and the level of service I was getting from my mobility provider just were not measuring up to what I was looking for.

In fact I was going to go with a pay per use service, with no contract and freedom to stop the plan or go to another provider without having to break any contracts. When I compared my usage for the past year to prepaid rates, I was actually going to save money compared to what I am currently paying so why would I not go this route.

Well it depends on who you talk to when it comes to negotiating rates and terms at mobile companies.  I purchase my  cellular service in Canada, so our rates are much more expensive compared to the US, however the concepts that I used during my conversation with my provider, Bell would apply equally to any of the US carriers or even other Canadian mobility providers.

And don’t forget this includes the device that you are planning to use as well as the plan that you may sign up for including voice, text messaging, and data plans. Many people focus in on one or two things, so step back and think about all of the things you are looking for and then contact the company to discuss your needs.

What are your choices when Updating Your Mobile Contract?

Go into the Store

They all have stores in many of the major malls and centers across the country. You can look at the phones and the standard packages and make a decision regarding what you want. If you are a new customer or are moving from another carrier, this is the place to start. You do not have a lot of negotiating power here other than to compare deals offered by the various carriers. The deals are what they are and it is up to you to decide which package you want to select.

Call Your Mobility Provider Help Desk

This is the next step especially for people who have existing contracts or have been with the carrier for some time.  When you call into the call center, you will be talking with a rep who has the authority to sell you the basics, in much the same way as the folks at the mobility store do. They may be able to offer you some discounts, however you will need to ask about them regarding what is available. The mobility rep may not tell you about these discounts without prompting.

Ask to Speak to the Retention Desk

These are the mobility reps with the power to cut deals and do what they need to keep you as a customer and if possible sign you up as a long term customer. These are the folks that can offer special deals, discounts and special situations can also be negotiated. They are motivated in having you continue as a customer and they will do just about anything to keep you. Here are a few examples of what I was able to negotiate:

  • Upgrade fees waived
  • Transfer fee for phone book to new phone waived
  • New phone provided
  • No new fees to begin contract
  • Calls to family phones included
  • Voice  messaging or voice mail included
  • Call forwarding, conferencing, display, forwarding included
  • Long distance minutes included
  • Local minutes for both phones shared
  • Text messaging included
  • 450 anytime minutes  included
  • Unlimited evening and weekend minutes included beginning at 6pm

And the best part is that this deal, while providing me with about the same service as previously is 37%  cheaper than previously, a huge savings!

To summarize, When Updating Your Mobile Contract

  • Ask to speak to the retention desk
  • Ask for everything you can think of to be included
  • Discuss going to the competition
  • Discuss the merits of various plans
  • The worst they can say is no, or offer something else which might interest you!

If you have had a similar experience, leave your comments. We all need help in keeping our costs down! For more suggestions on Mobile contracts, click here.

Save


Tire Pressure and Safety

tire pressure and safetyIt has long been known by most of us that proper tire inflation can save on fuel costs. Many people, however, do not realize that proper tire inflation not only prolongs the life of the tire, thus saving on replacement costs. But also impacts on the wear and tear experienced by various parts of the steering assembly itself. Additionally, Tire Pressure and Safety are directly related.

Proper tire inflation simply improves  driving control by reducing the amount of corrections and control required from the driver. Proper tire pressure can actually avoid car accidents. It can save you a great deal of money and frustration.

Tire Pressure and Safety

Regular Tire Inspections

Safety is also impacted when proper tire inflation is combined with regular inspections and other appropriate tire care steps because there is less chance of unexpected tire failure in dangerous highway driving and other traffic situations.

So, all year round, increased safety and fuel economy can rest on something as simple as regularly inspecting your tires visually and maintaining proper tire inflation pressure. It is also a good idea to make note somewhere of when tires are purchased, including both date AND mileage. Many of us tend to let such bits of info slide into the background as we drive at top speed with our loved ones on tires which may be nearing the end of their effective, safe lives.

Check also when tires were manufactured. Any tire older than 7 years should be suspect and not only checked regularly, but also replaced as soon as they show signs of deterioration. Some tires are sold as new, when they are already 5 or 6 years old so check with the dealer before they are installed.

Check Tires Before Seasonal Changes in Weather

Due to weather changes and road conditions in various areas, additional checks, maintenance, and operations may be called for.

Winter presents unique challenges in some areas and in almost all areas from time to time. Cars may become stuck in snow, roads may become icy, and vehicles may slip and slide at exactly the worst time possible. Winter is NOT a time that you want a tire to fail, so the usual inspections and maintenance become even more important. Properly inflated tires can help maintain traction as well as aiding in regaining control in skids and slides. If stuck in snow, by the way, try to avoid spinning your tires. This can cause overheating of the tire and may possibly contribute to a future failure of the tire.

Tire Pressure and Safety – Avoid Potholes

After Winter has done its damage to drivers in many parts of the country, a new phenomenon may appear in abundance. Many new potholes happen due to a cycle of freezing and thawing of water under the roadway. Potholes can be tire killers at any time of the year, but, because of this cycle, there seems to be more of them after Winter has passed. Often, the damage a pothole inflicts on a tire is invisible, although the damage to the steering may become immediately evident due to the “pulling” of the vehicle to one side or the other, or vibration which wasn’t present before.

Obviously, avoiding potholes completely is the best way to protect your tires against damage. However, as we all know, this is not always possible. Here is a tip on how to hit a pothole with minimum damage to your tires. First and foremost, do NOT brake during the impact itself! This creates a solid impact at a given point and will produce the most damage. Instead, brake as much as it is safely possible up to just before impact. Release the brakes in time to roll across the pothole. This will result in a rolling contact which produces less damage in most cases.

Proper Tire Inflation

When deciding on proper inflation pressures, your car manufacturer will usually provide the recommended pressures in the owner’s manual. This information is also on a data plate commonly located on the door frame. Or in the glove compartment, or under the hood. However, aftermarket tires purchased later may require different inflation pressures. In this case, it is good to check with the tire dealer on what would be the best inflation pressures.

Tire Rotation

Last, but not least, a word on tire rotation. Obviously, not all tires are going to experience the same wear at the same time. For this reason, it is usually considered a good idea to periodically rotate tires. Your best bet in most instances is to simply go with the car manufacturer’s recommendations. But a rule of thumb might be to rotate tires every 6,000 miles on most cars. In addition every 4,000 miles on cars with 4-wheel drive.

In these days of high fuel costs, and with the possibility of even higher costs in the future, this is a simple way to improve fuel economy. Consider that you can also prolong the safe and effective life of your tires as well. You will also not only be putting more money in your own pocket but will be helping reduce the power needed to produce more new tires. As a result this will help reduce America’s dependence on foreign oil as well.

For more information about tire safety and tire performance, click here.


Floor Stain for Hardwood Floors

Floor Stain for Hardwood FloorsHardwood floors look their best with the right floor stain for hardwood floors applied in your home that matches your overall decor and design for your home. Whether you are buying new or restaining a floor, the biggest decision is the color of stain you chose. Most hardwood floors come pre-stained and pre-finished, so there is no work to do other than installing the floor.  After years of use, you may need to strip the floor and sand it to remove scuff marks and remove the old finish. Once it is properly sanded you can then apply the hardwood floor stain properly to bring out the beauty in the wood. At this time also you can choose to change the original color of the stain or keep it the same, the choice is yours.

Floor Stain for Hardwood Floors

Pre-finished hardwood floors come in all sizes and colors and it can sometimes be difficult to decide what color of stain to choose. This means you shouldn’t have any trouble finding a stain to match with your wood furnishings or one that suits your overall decorating style. Also, the variety of stains available can come in handy when it comes to repairing scratches or water spots on your floors. You can find a hardwood floor stain chart from any hardware store and match this against your floors at home. Of course you can also cover these marks with an area rug or some piece of furniture that will hide the marks. Of course if the marks are in the middle of a traffic area, your only choice is a rug or carpet that can cover the area and enhance your overall rooms decor.

If you are someone who likes a light airy feel to your home you will likely go with a blond or light colored stain, while people who have darker requirements and furniture tastes will go for something that has a darker mahogany type of stain. Spend some time with the floor salesman, ask many questions and look at pictures in magazines to asses which style of wood and color of stain you would prefer.

Staining Hardwood Floors

Hardwood floors will need to be stripped and re-sanded after heavy use or many years of service. Choosing a the right floor stain for hardwood floors can be easy – just use the same as before, or more challenging if you plan to change the overall look of your home. When you have your stain chosen it is important that you know how to apply it properly to avoid blotches. Most people choose oil based stains because they are easy to handle and apply. When you apply the stain make sure to work in a well ventilated area and keep all ignition sources away from your work area. Apply the stain with in the direction of the wood grain with a rag making sure to apply an even coating. It is often helpful to have someone work with you to wipe away excess stain often. Also you should change rags regularly.

With the right selection of hardwood floor stain and care in application, you will have your hardwood floors looking their best. Whether you are purchasing a pre-finished hardwood floor or refinishing an older floor,  the benefits of a hardwood floor will last many years! Many people will also place area rugs to add texture and a warmer feel to the room. These rugs also protect the floors as well from higher traffic and scuffing.

Save


  • Copyright © 1996-2010 Managing Home Maintenance Costs. All rights reserved.
    iDream theme by Templates Next | Powered by WordPress