 Installing a hardwood floor properly will help to make it secure so that it does not have many squeaks when you walk across the floor and ensure that it lasts a long time as well. There are various methods to install a hardwood floor ranging from floating, staple down, and nail down to glue down. In addition preparation is important. The sub floor should be nailed down or preferably screw nailed down to the joists underneath so that there are no squeaks from the support floor.
Some people will even install a second sub floor to provide extra strength and avoid any squeaks in the floor altogether. This is probably the single most important step to take to avoid a squeaky floor. Some people will go as far as screw nailing another layer of half inch plywood on to the original floor to provide a really solid base. Before you take this step, some planning is required.
Planning the Installation
Review all locations where there are doorways and locations that interface with either carpeting, marble or tile. Consumers will want to avoid causing a significant surface level difference. This can be a great place for people to trip and fall. Adding the second level of plywood to firm up the floor also raises the floor by 5 /8’s of an inch and will make matching to other floor surfaces in other rooms a challenge. There are various tools and supplies available at the do it yourself department stores to help in this regard. If you are hiring an expert installer to install your floor you may get some ideas from this person as well.
Hardwood Floor Installation guide
The first step is to get the installation instructions as provided in the user’s manual provided by the manufacturer you purchased the hardwood floor from. Read the manual carefully and prepare a plan for your floors layout. We also recommend taking advantage of courses that are offered, usually for free at local stores who are selling hardwood flooring. They understand that people want to save money and will try doing it themselves. They would like to get the sale of the flooring and they also want satisfied happy customers. These free courses go a long way to obtaining a sale and also ensuring that the customer is satisfied with the floor after installation.
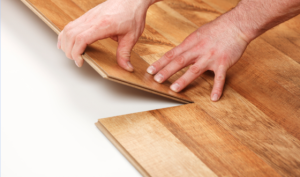
Floating hardwood floors are the easiest method for floor installation.
The first step in installing a hardwood floor is laying out an accurate reference line. There are a number of tools you can use to simplify the process.
- Pneumatic Floor Stapler (rented)
- Air Compressor ·Power Miter Saw
- Pneumatic Finish Nailer
- Drill and Bits
- Table Saw(or Circular Saw)
- Basic Carpentry Tools
Buy the Tools
These tools are sure to simplify the entire process of the hardwood floor installation process. These tools can be purchased if you are doing a large job. Or in most cases they can be rented for several days or weeks depending on how long you need the equipment. There is a trade off between renting and purchasing which really is linked to how much floor you will install. Also how long it will take you. A friend of mind likes to take his time and will purchase most of the tools. He can take his time and not worry about returning them when not in use. When he is finished, he often sells them if they are no longer needed.
Always ask the tool renter to show you how the equipment works. Also follow all of the safety precautions to avoid any injury. They also rent heavy duty extension cords for this equipment.
Also make sure you learn all about the hardwood floor cleaning tips. Installing is only half the job over the life time of the floor. If a hardwood floor is kept clean of dirt and grit it will remain shiny and new for many years. Remove your shoes at the door and vacuum often to remove all floor grit.
February 28th, 2013 on 9:41 am
Thanks for all the tips about hardwood installations . I am not going to install a hardwood floor myself but now I know what to look for when I hire an installer