 Good hardwood flooring installers sometimes can be hard to find. Home owners who are looking for hardwood flooring installers should know a little about the installation process so that they can evaluate the installers that they may be hiring. Otherwise you are simply hiring someone that the store may have recommended or who has installed a floor for a friend of yours. He may do a fine job and then again he might not. By knowing something about the process, and assessing what approach the installer will take with your floor, you can increase the odds of a fantastic job that you will be satisfied with for many years.
Hardwood Flooring Installers – Summary
The following are a summary of the steps that an installer would follow to ensure a quality job that everyone will be proud of:
- Hardwood Floor Preparation
- Considerations for Wood Floor Installation
- Getting Started
- Layout and preparation of Your Hardwood Floor
- Cutting and Fastening Your Wood Floor
- Install the Baseboards
Hardwood Floor Preparation – always ensure that the sub floor is clean, smooth and structurally sound. Either screw nail the existing sub floor to the joists underneath or add a 5/8 sheet of plywood to the floor and screw nail it to the existing sub floor to avoid any possibilities of a squeaking floor when someone walks across it. Adding an additional subfloor will add some sound proofing, but will also raise the floor by 5/8 inches, which will have to be adjusted for when it meets other types of flooring. You may also have to shave 5/8 inches off the bottom of doors as well at entry points. Concrete floors should be handled in a different manner.
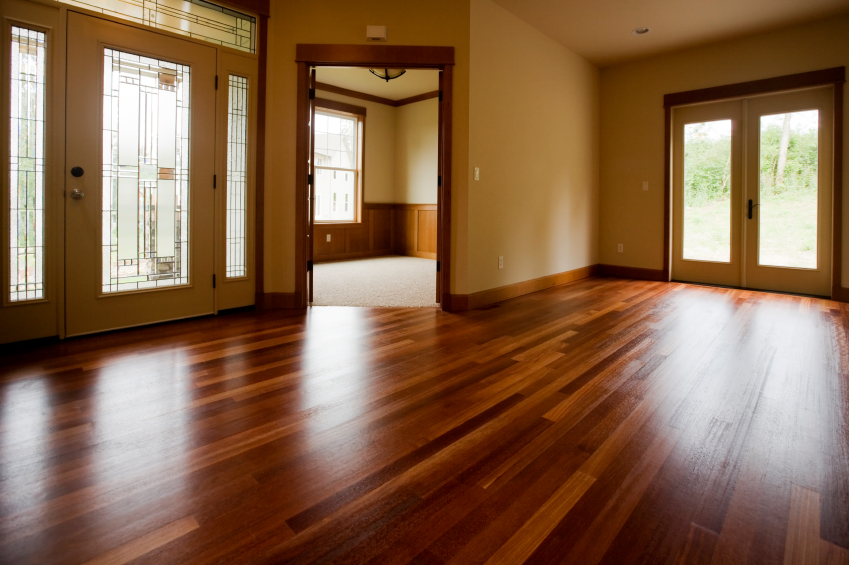
Considerations for Wood Floor Installation – hardwood floors come in different varieties such as engineered or solid wood flooring. Engineered flooring will not warp or twist, however there is only a solid wood veneer on the flooring over layers of wood. Solid wood flooring should be acclimatized to the home before being laid and it can be sanded many times to renew the perfect look you want after many years of high traffic use. If there is a crawl space underneath, protect the flooring by installing a vapor barrier and also ensure that the crawl space is properly vented.
Getting Started
Planning is everything and do it yourselfers need to investigate and plan how they will start. Determine the direction of the floor joists and install the wood floor planking perpendicular to them. Begin with the longest and most visible straight wall. Most walls in homes and rooms for that matter are not perfectly straight nor are the rooms square. Starting with the most visible and longest will ensure that your rooms floor aligns with the most visible portion. If you need to install a vapor barrier, install it first, and stable it to the floor to hold it in place. Using a chalk line mark a line that is ½ inch from the wall. This is the location of the first board that will be put in place. Mark the locations of the joists so that you will nail this first board at all joist locations.
Layout and preparation of Your Hardwood Floor
Once you have the chalk line in place, pre-drill holes in the first board close to the edge that will be against the wall. Nail your first board along the chalk line and counter sink the nails. The holes will be filled with wood putty later to cover the holes. Complete the first board and then step back and check for alignment to the wall, straightness of the first board and confirm that this critical first step has been done correctly.
Cutting and Fastening Your Wood Floor
The next rows can now be installed. Cut boards in such a manner that the joints do not line up with joints in previous rows. This will add strength to the floor and also add texture and beauty to the floor. Begin installing the remaining rows using a hardwood floor nailer, making sure that all boards are securely in place before nailing.
Continue laying the rest of the hardwood floor using the nailer until you reach the other wall. These boards will need to be hand nailed using the predrilled approach and wood putty to seal the holes.
Install the Baseboards
The last bit of wood to be put in place are the baseboards. You left a ½ inch space between the hardwood floor and the wall for expansion. The base boards will cover this space nicely. Many people will paint the baseboards first before installing them. Fill nail holes with wood putty and then touch up with paint to finish the overall look.
Junctions with doors and other floors should also be considered, however this is the subject of another post.