 It has been a few years since the stain on your deck was applied, and now it is beginning to crack and chip away. In addition, the sun has begun to change color, causing fading. You may also want to change the color to fit your new lawn furniture and other decor. It is time to remove the old stain and apply new stain to improve the overall look of your home. This is an easy do-it-yourself project that does not require many tools. In fact, many people will already have what is needed; if not, the money you save by doing this work yourself will more than pay for the tools you need. For example, a garden hose with a high-pressure nozzle will do the trick, but you may want to use a pressure sprayer instead. A pressure sprayer can be used for all kinds of little jobs, so why not purchase one with the money you are saving on this job? They also help with stain removal from fences as well.
Steps for Stain Removal from Fences & Decks
Here are the steps to follow, and we will add a few comments at the end to emphasize some of the steps in more detail.
- Move furniture away from the work area
- Remove debris such as leaves and dirt
- Remove all loose paint or stain
- Protect any areas such as walls and shrubbery
- Apply stain remover
- Allow to soak for 5 to 45 minutes
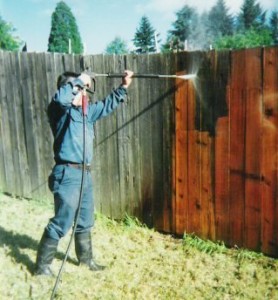
- Remove old stains by washing them with a garden hose or pressure washer
- Scrape any remaining loose stain
- Re-apply stain remover and wash again if needed
- Allow to dry for at least 24 hours
- Sand-exposed wood to remove any roughness, splinters, etc
- Apply new stain as needed.
If you decide to use a pressure washer, hold the end of the nozzle at least one foot away and adjust the sprayer to its widest setting to avoid gauging the wood and causing more damage. A pressure washer can do a lot of damage quickly, so if this is the first time you are using one, experiment on a test piece first.
Allow the deck to dry at least 24 hours after cleaning. You want the wood to be nice and dry before sanding. Sand all of the rough edges and the flooring to ensure that it is smooth and that there is no chance of slivers for anyone walking across it on bare feet. Once you have completed this step, you are ready to apply the new stain. Ensure you have dry weather for another 24 hours to allow the new stain to dry properly.