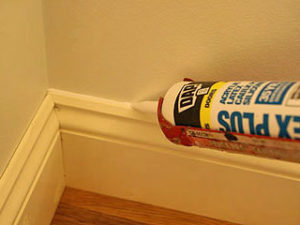
 Ever wonder how professionals make their baseboards look so great? No cracks or dark lines along the wall where the baseboards meet the wall. It is actually quite easy once you know the tricks that the professionals use to caulk baseboards. Use high quality paint-able caulking to fill the cracks before you paint the walls or the baseboards. When you cut the tip off the caulking tube, keep it small so that a minimum of caulk is applied. Using continuous pressure, run the tip of the tube along the joint filling the crack as you go. Remember that less is better, You can always add more later if needed. At this point the crack is filled, but it still may look a little rough and unfinished.
How to Caulk Baseboards – Smoothing
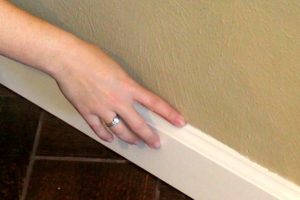 The last step is to smooth the caulking with your finger. We like to keep our finger wet with a little bit of water. Run your finger along the crack filled with caulking to leave a smooth surface that fills the crack between the wall and baseboard. If you need more caulking in some areas because the crack was too large or you did not add enough caulking in the first place, just add more and repeat the smoothing process.
I like to have a paper towel handy to clean my finger of excess caulking. Wet your finger each time to deliver a smoother joint and decrease the amount of caulking material that adheres to your finger.
Let the caulking dry for 24 hours and then paint as needed. You will have a very professional looking joint as a result.